Dear Customers / Partners,
May this New Year (Christmas) brings you moments of peace, the warmth of cherished memories, and the love of family and friends. We extend our heartfelt wishes for a Merry Christmas and a New Year filled with prosperity, success, and continued partnership.
In the spirit of the season, we thank you for your trust, dedication, and collaborative efforts. It is our privilege to work alongside you, and we look forward to achieving even greater milestones together in the coming year.
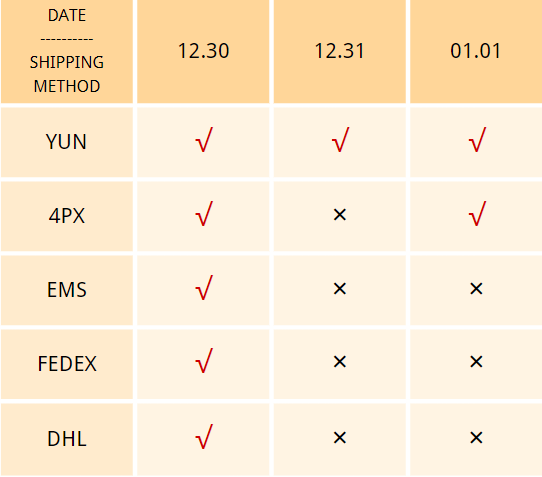
Due to the upcoming New Year’s Day holiday (Dec. 30th to Jan. 1st), we would like to inform you that there will be a delay in production and shipment.
1)The factory holiday is 2 days, so orders placed during this period may be delayed by two days.
2)Details of the shipping delays are shown in the table below.
3)Holiday delays do not count towards the fulfillment time guarantee.
You can place orders as usual, we’ll manage them.
Our customer service team is on duty 24 hours, if you have any questions or concerns, please feel free to contact us. ( Messenger / Facebook / lnstagram )
Our team will do everything possible to minimize any inconvenience caused by these delays.
Happy New Year!
STAY IN TOUCH!
business@popcustoms.com