Dear customers, Here comes POPCUSTOMS Warehouse Service! Save production time for your store’s peak season!
📍Discount:
Place a warehouse order OVER $300, GET REFUNDS $15, Place a warehouse order OVER $500, GET REFUNDS $30, Place a warehouse order OVER $1000, GET REFUNDS $70, Place a warehouse order OVER $2000, GET REFUNDS $150.
The generation speed depends on the computer performance and the number of generation, upgrade your computer or reduce the number of one-time generation.
We previously provide only black and white shoelace options, now we allow sellers to add different color shoelace options for shoes under one listing.
Follow the steps below to know how to make it happen!
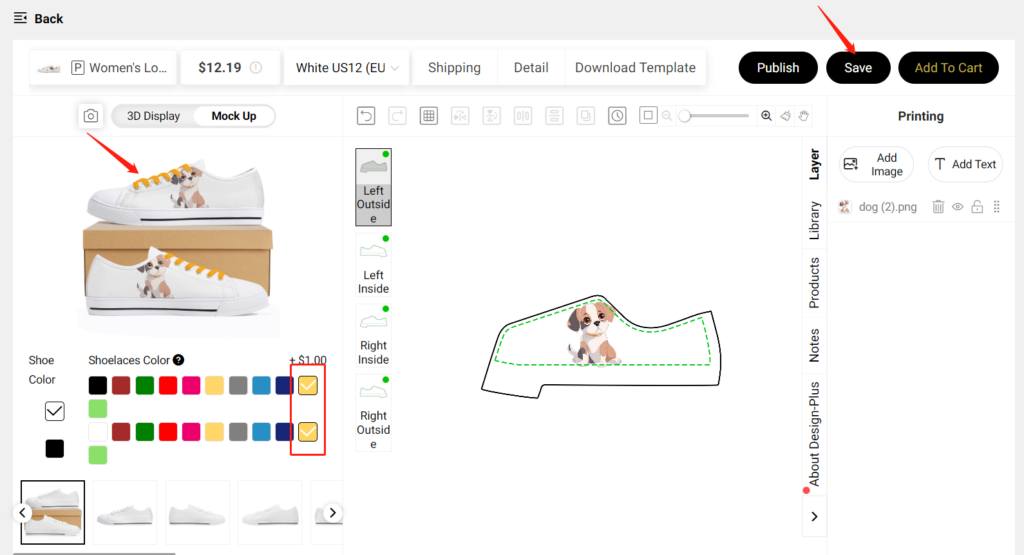
Step 1: Choose a shoelacecolor
You are allowed to choose different shoelace colors for different colors of soles. For example, I choose a yellow shoelace and a red shoelace for low top canvas shoes.
Click Save then you’ll see the mockup with the different color shoelaces.
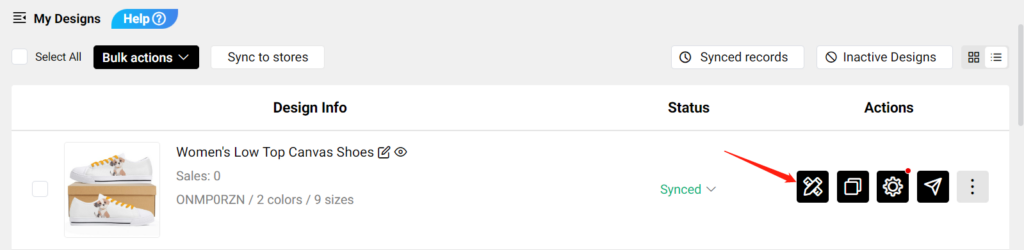
Go to My Designs to find the shoes that you saved, and click Editdesign to edit the color of the shoelace.
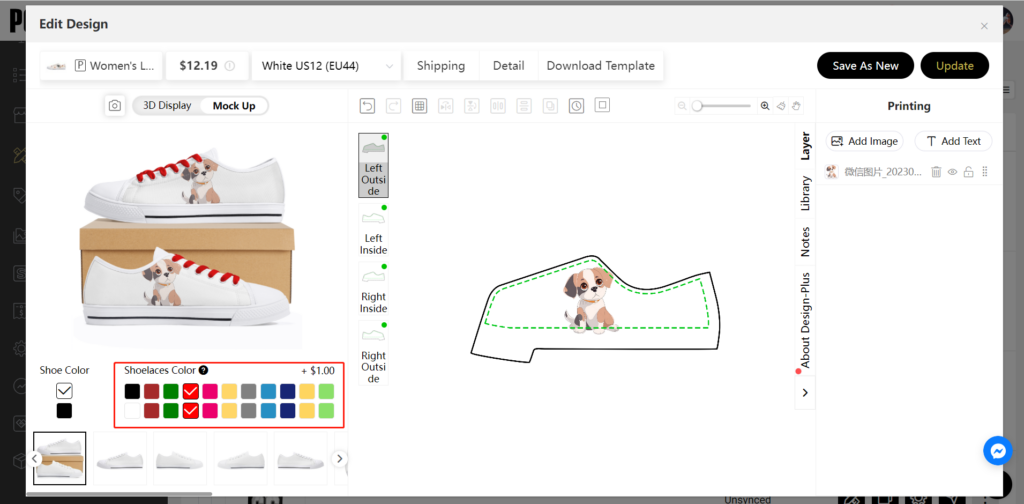
Change the color of the shoelace and click Save As New. In this way, you can create many shoes with different shoelace colors quickly and conveniently.
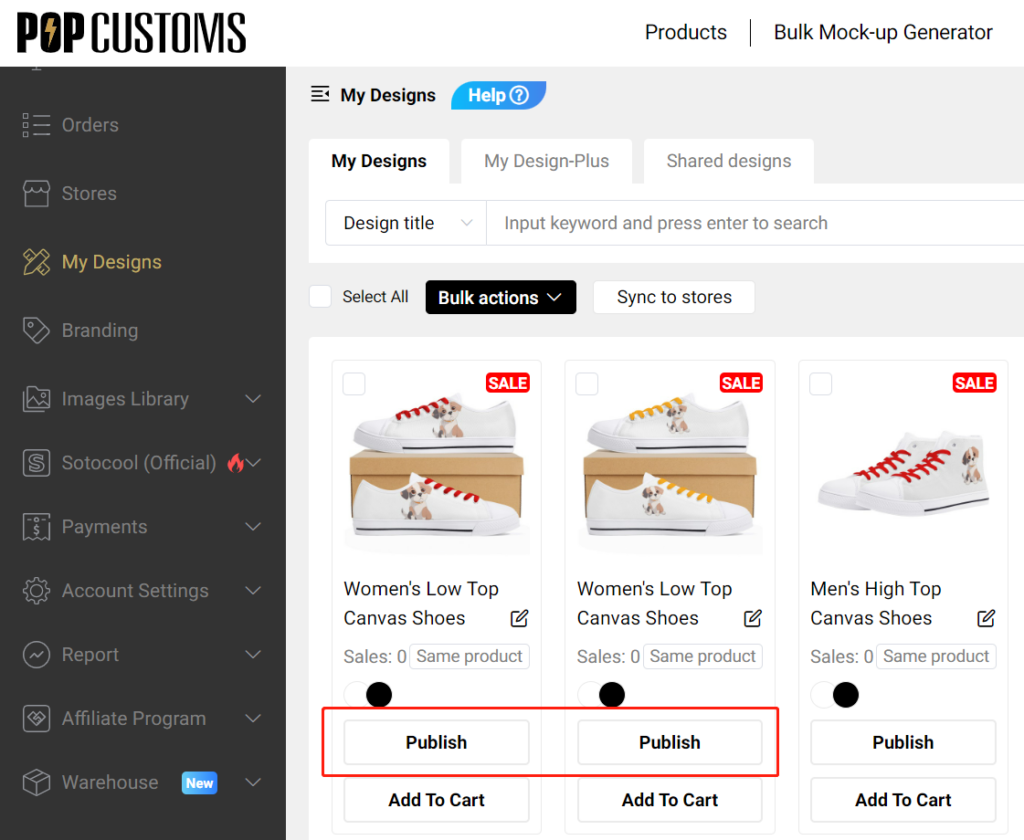
Step 2: Publish to your store
Go to My Designs, publish these shoes to your Etsy store one by one.
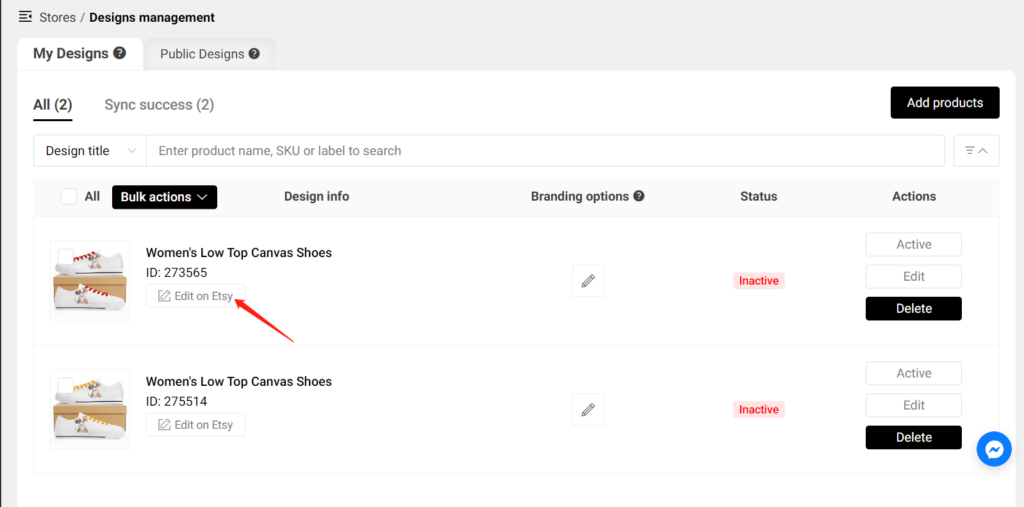
Then go to Stores – Synced designs, click Edit on Etsy, or go to your Etsy store to edit listing.
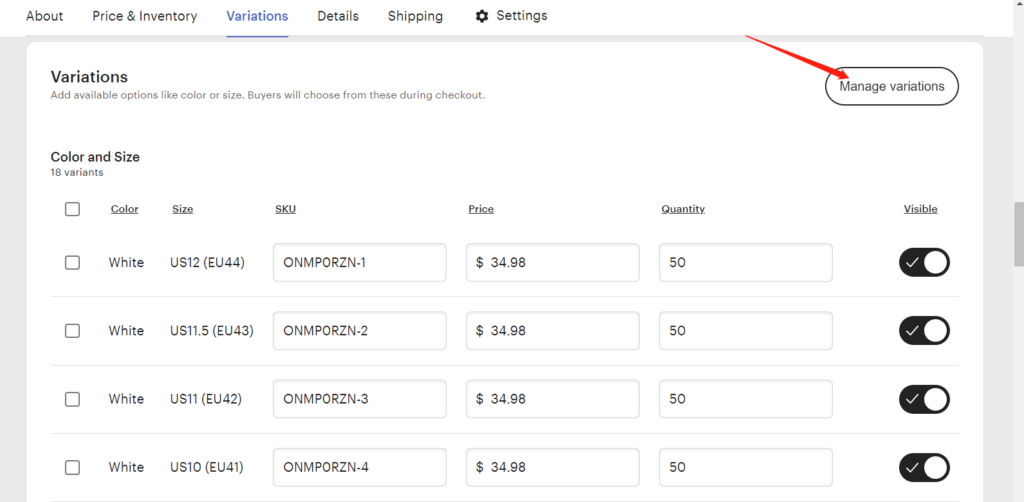
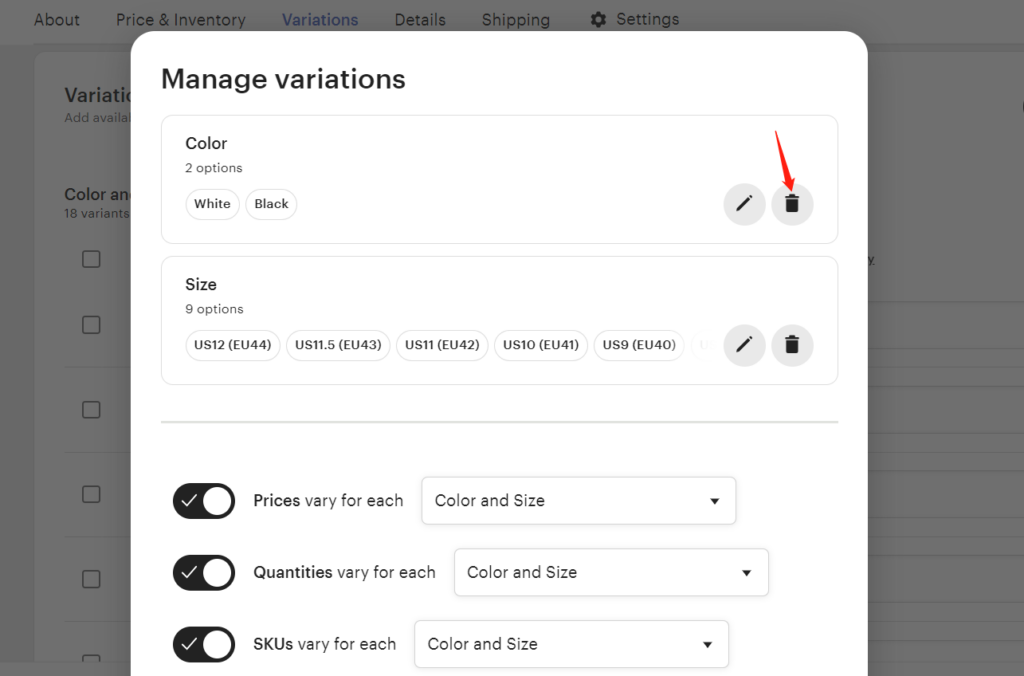
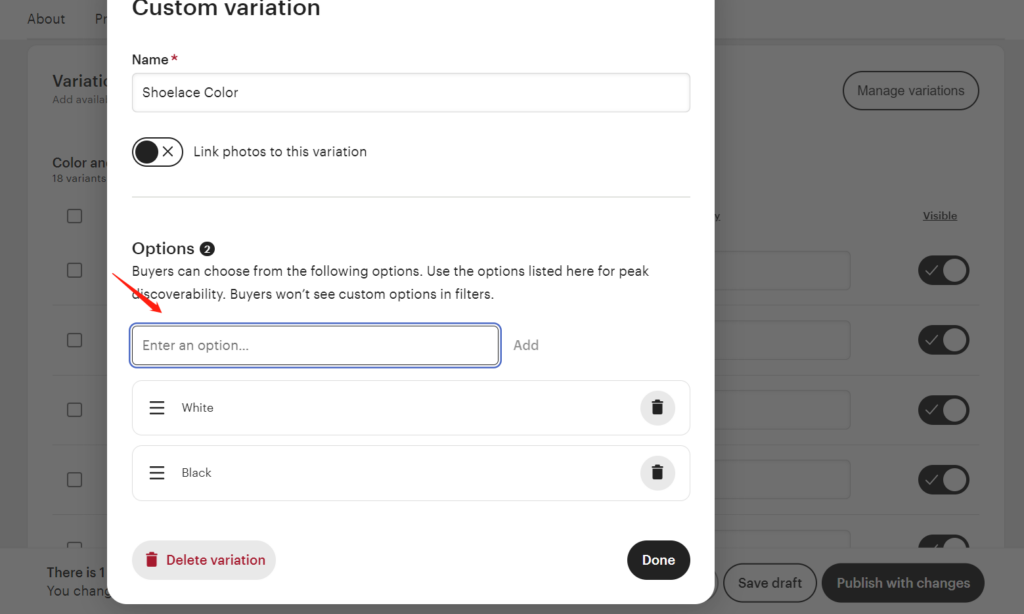
Click Manage Variations to delete original Color options and create new options in Etsy.
Add the shoelace color and sole color like “Black+color (all sizes…) / White+color (all sizes…)
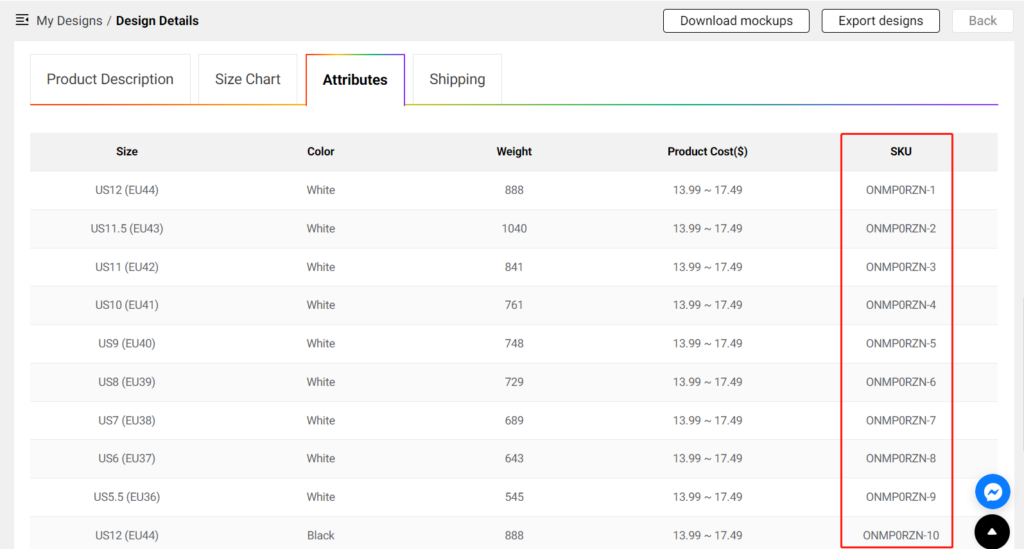
Go to My Designs – Attribute, copy each sku from POPCUSTOMS and paste to the new option.
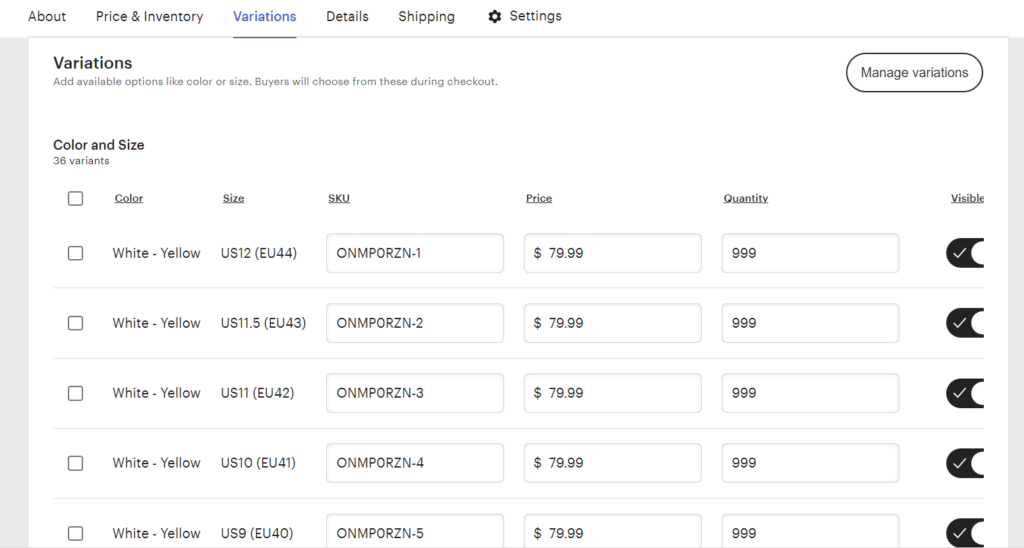
Finally, click Publish with changes, these shoes will be combined with different colored laces and sold in your Etsy store.
*Please kindly noted that your customer will receive the shoes with the lace color they chose.
We are excited to announce that you can integrate your Wix store to sell with us now!
Follow the steps below to set up the integration between your Wix store and our POPCUSTOMS.
Step 1: Sign up on POPCUSTOMS
Step 2: Connect your Wix store
Step 3: Sync products to your store
Step 4: Sync orders to POPCUSTOMS in real-time
Step 1:Sign up on POPCUSTOMS
First of all, you should have accounts both on POPCUSTOMS and Wix. If you don’t have signed up for your account on POPCUSTOMS, please register with us now.
Step 2: Connect your Wix store
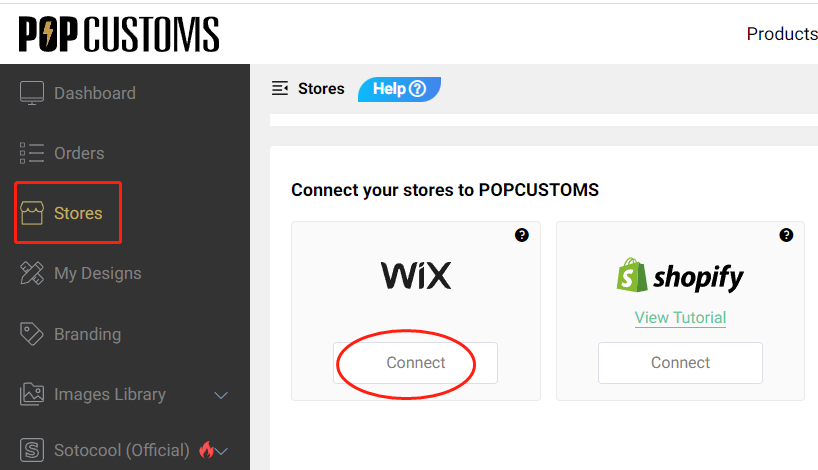
Log into your POPCUSTOMS account, go to Stores to find Wix, and click the Connect button to get started.
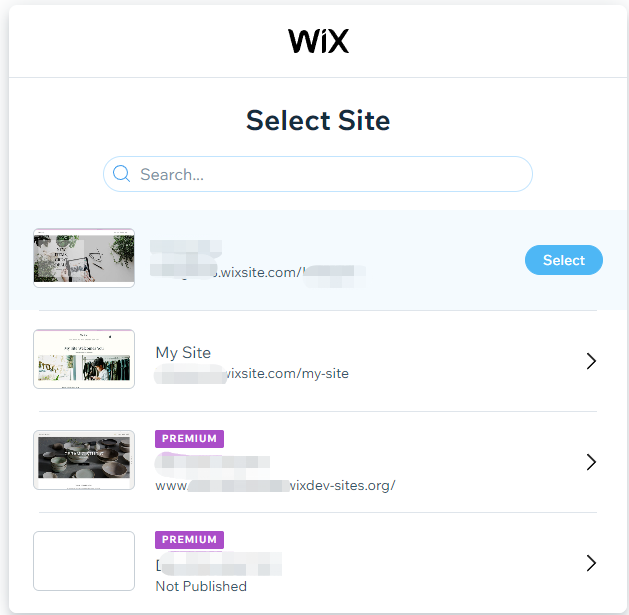
Choose a Wix store that you have to connect.
*Make sure that your Wix store is Published, if the status is Not Published, please go to publish it first.
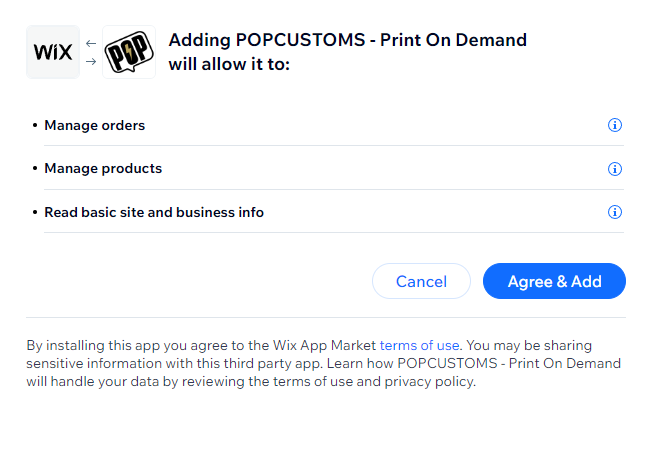
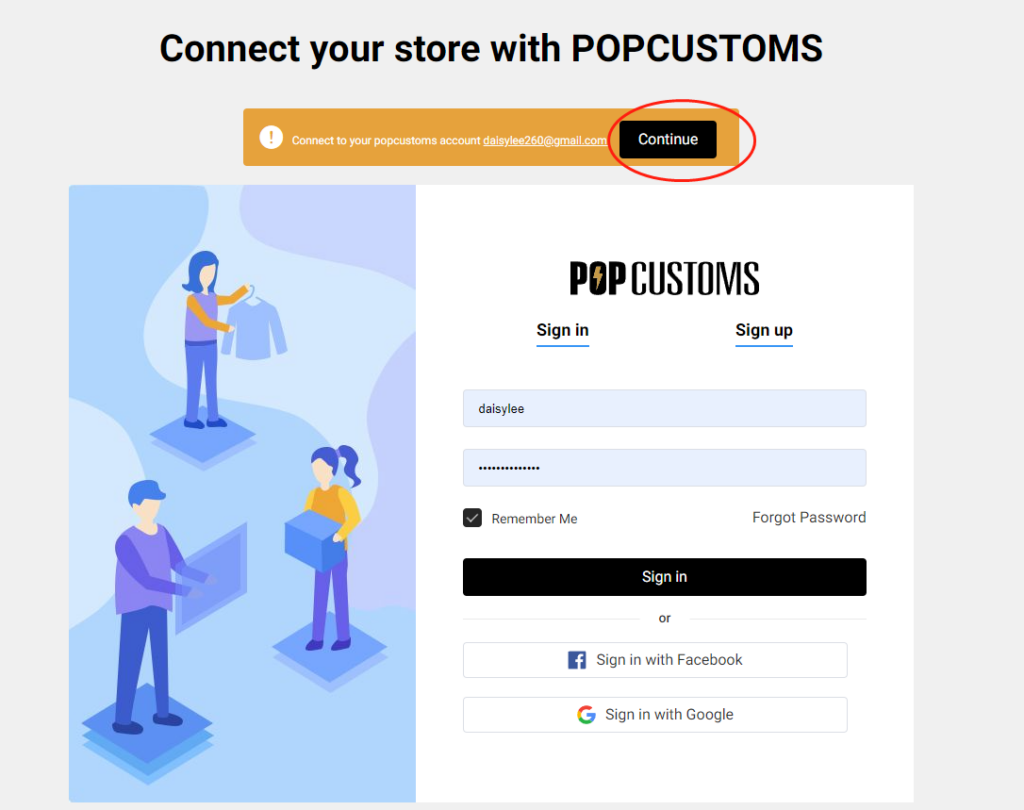
Click Agree & Add and then you’ll be driven to our site, sign in and click Continue to move forward.
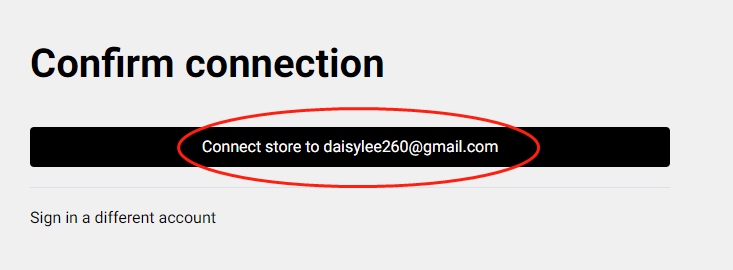
Click the black line to confirm the connection between your Wix store and POPCUSTOMS.
Step 3: Sync products to your store
Go to our product page to select products to design and sync them to your store.
Step 4: Sync orders to POPCUSTOMS in real-time
When your customers place orders from your store, the order will automatically come to our site in real time.
Something important to know:
When your orders are shipped out, we send an email to the recipient by default. The email will be sent on behalf of the seller’s store and will never contain any information about POPCUSTOMS. You can check the email template by clicking Wix admin -> Settings -> eCommerce Settings -> Order email notifications -> SHIPPING CONFIRMATION. You can also uncheck the box to turn it off so the email will not be sent to your customers, or click the Edit button to edit the email notification as needed.
Don’t support updating mock-ups; Support syncing combined products but not personalized products to Wix.
Previous Wix users should integrate your Wix store again so the product and orders can be automatically synced between your store and our site.
From July 27th to July 30th our factory location experienced a typhoon. This typhoon caused a power outage. The government also notified all factories and office workers not to go to work. As a result, all factories and shipping companies were unable to work normally. We apologize for this.
During this period, production and shippment may be delayed by 3-5 days, ans the delay caused by this typhoon will not be covered by our fulfillment guarantee.
Thank you for your understanding. Our team will do everything possible to minimize any inconvenience caused by these delays.
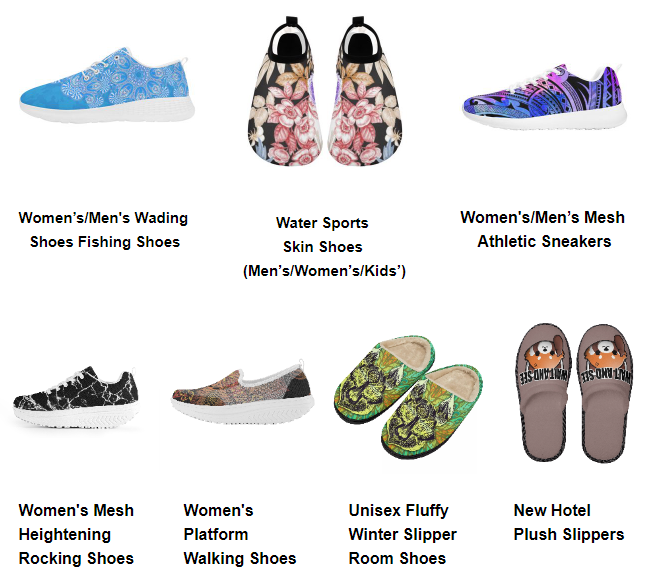
After evaluating our product sales, we have decided to temporarily remove some of our lower-performing products from our website starting August 1st. Additionally, due to a temporary halt in the supply of factory shoe soles, some products will also be affected. The items that will be removed are shown below. We apologize for any inconvenience this may cause and ask for your understanding. Stay tuned to our website as we’ll have other new products soon.
We’re excited to announce the release of our new Design-Plus! This Design-Plus feature allows you to create customizable products by yourself so that your customers can personalize your products with their own photos and text.
Hightlights about new Design-Plus:
You can now create your own Design-Plus products for personalization
All products, including shoes, are Design-Plus supported
To try out the new feature, simply log into your POPCUSTOMS account and go to “My Designs”. Follow the tutorial to create your first Design-Plus product and then publish to your store.
Just in case, here is the video tutorial about how to create and setup Design-Plus Product
We are sure this great impressive feature will give your business steps ahead compared with your competitors!
Here are some additional benefits of using the photo and text personalization feature:
It can help you increase your sales by up to 30%.
It can help you reduce returns by giving customers the opportunity to preview their personalized products before they buy them.
It can help you improve your customer satisfaction by giving customers a sense of ownership over their products.
We’re confident that this new feature will help you take your business to the next level.