Category Archives: Shopify

Q: Why can’t I sync products to my Shopify store?

If you sync products to your store but they don’t show in your storefront, please click Stores -> Designed products -> Failed to find the reason.

We collect some reasons and solutions for your reference,

1- Exceeded the maximum number of variants allowed

If you have 50,000 or more variants/SKUs in your store, you’re subject to Shopify daily rate limit: 1,000 variants/SKUs per day. If you’re on the Shopify Plus plan, then the limit doesn’t apply to you. For a product, you can create up to 100 variants/SKUs. If you exceed the maximum number of variants allowed in Shopify, the product cannot be synced to your store. Under this condition, you must separate the product into two or more products to sync to your Shopify store.

Stores with 50000 or more variants are subject to a daily rate limit for uploading variants by using an app or CSV file import. You can add up to 1000 new variants in a day before the limit is reached. If you exceed this limit, then an error is displayed and you need to wait 24 hours to add products to your store again. Plus stores are exempt from this limit.

Click here to learn more about the rules of the variant on Shopify.

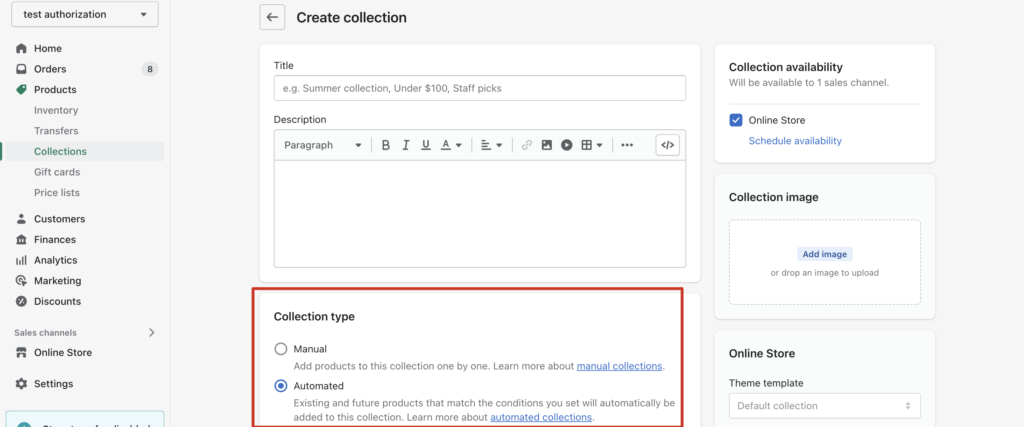
2- Collections show “No Data”

When you try to sync products to your store but there is no collection data for you to choose from. To solve this problem, you should go to your Shopify store admin to change the Collection type from Automated to Manual.

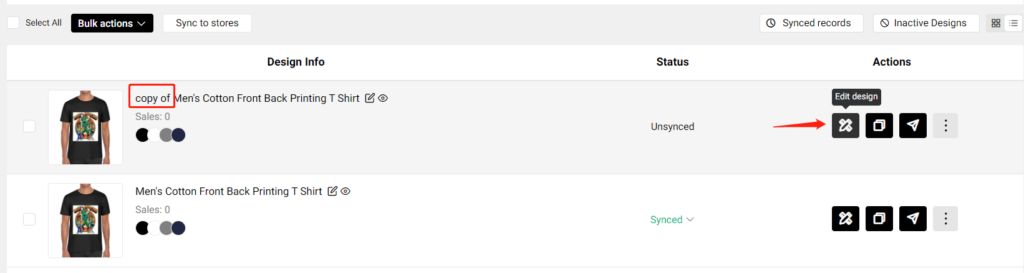
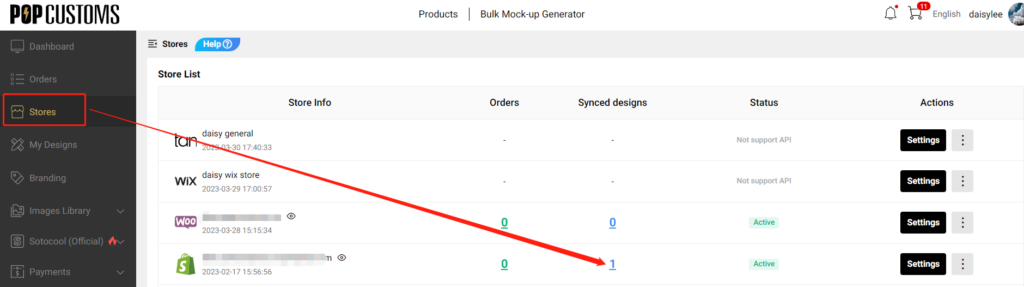
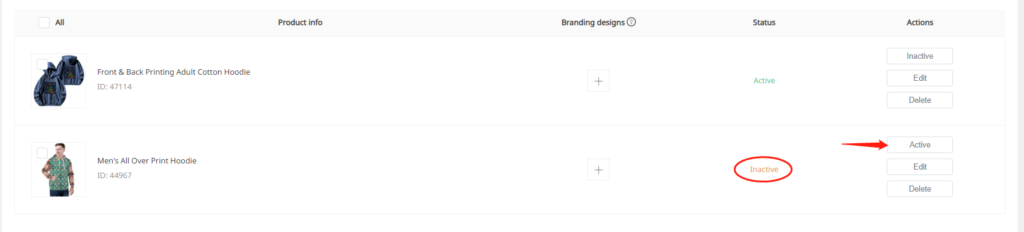
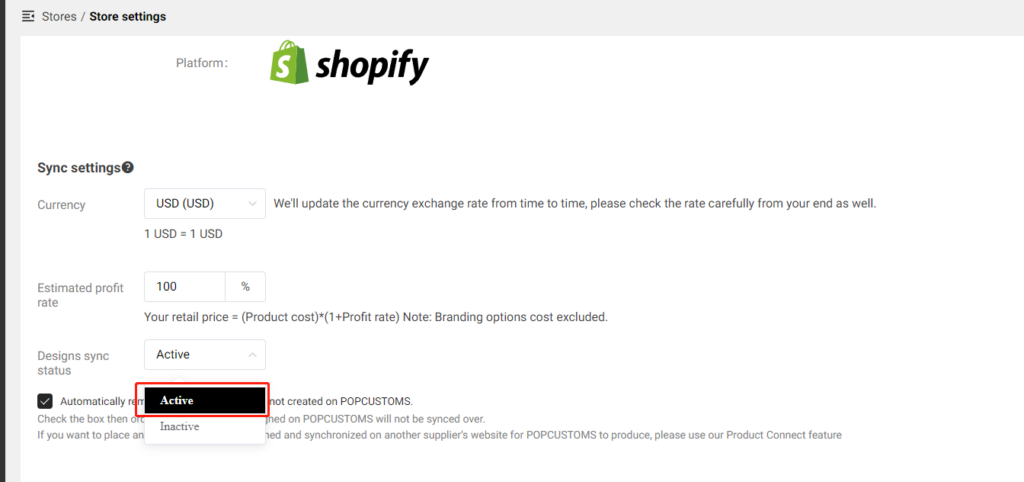
3- The status of your synced products is Inactive

Go to your Dashboard>Stores, find your Shopify store, and then click the content under Synced designs to find it,

If the status of your synced designs is Inactive, change it to Active then it will show in your storefront successfully.

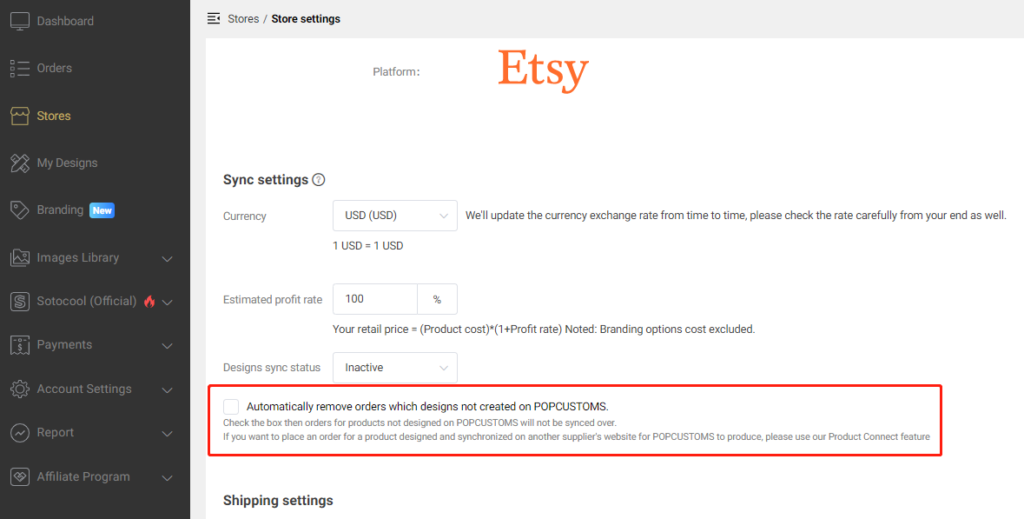
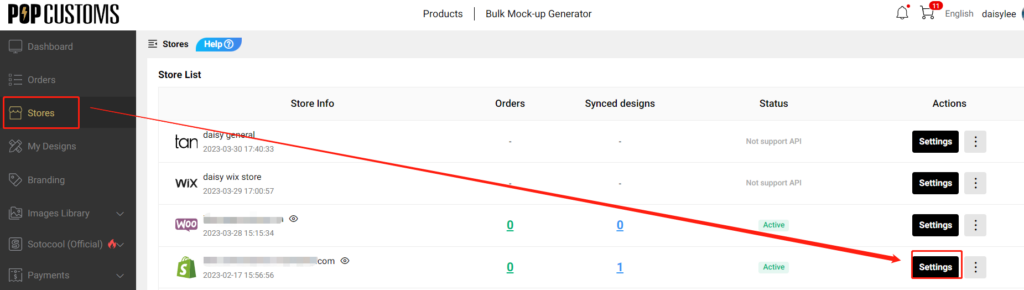
To avoid this issue happens again, we suggest you allow all synced designs from our site to your store to publish automatically in your store. Go to Stores-> Settings to complete this setup as follows.

4- Delete products from my Shopify and can’t sync them again

When you delete a product from your Shopify admin page, you have to delete the previous sync record from POPCUSTOMS as well.

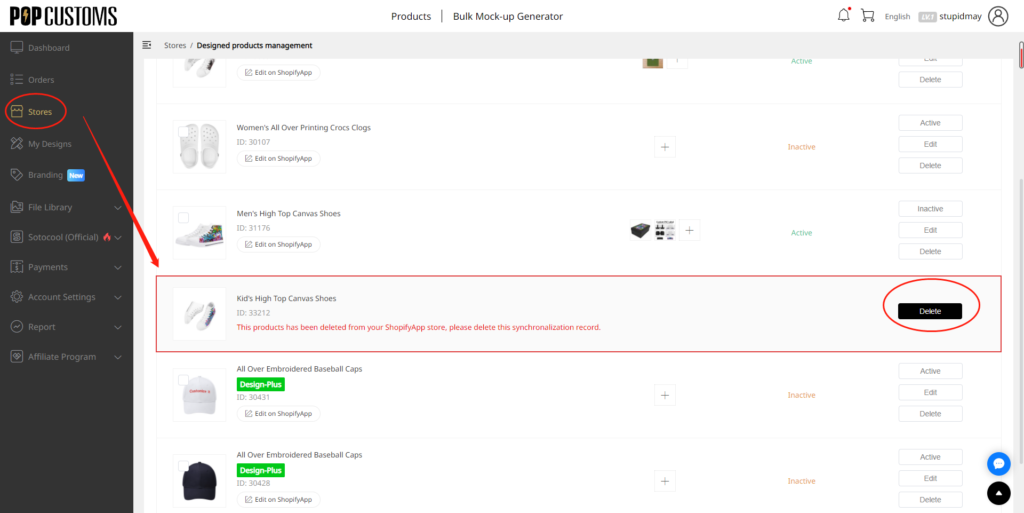
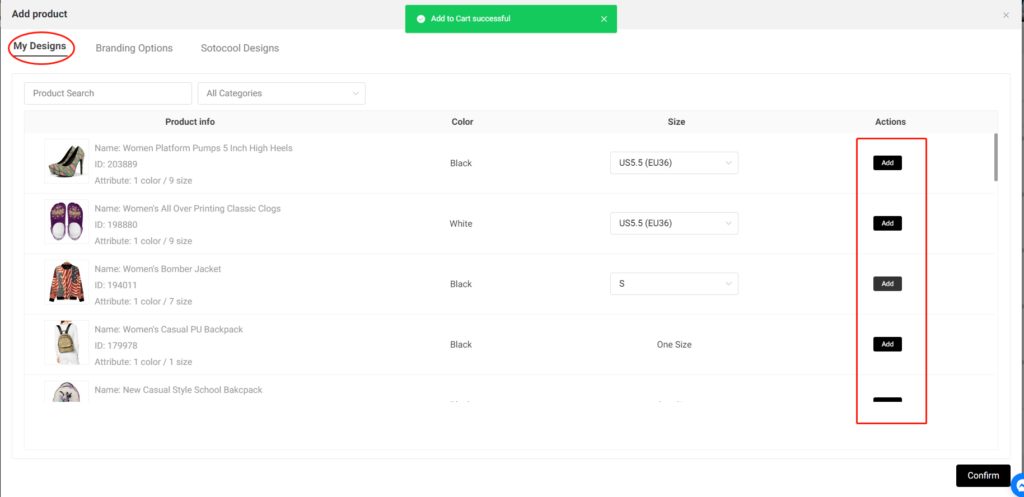
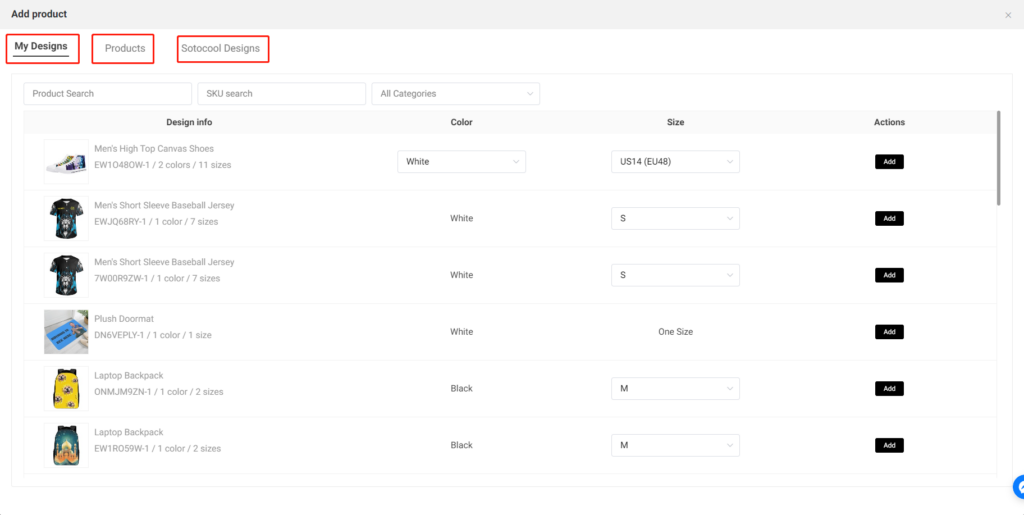
Then you can go to My Designs to find this product to resync it again to your Shopify store.

Q: How to transfer your existing orders for products designed at other suppliers to POPCUSTOMS for production?

Are you looking for a new Print-on Demand supplier to fulfill your existing business, because:

  • You want a better margin?
  • You want a better fulfillment service to better match your business development?
  • You want more shipping options?
  • You want to reduce the number of pod platforms (for easier management) but still be able to provide a wide range of products?
  • You are troubled by the fact that the original platform out of stock?

Take a moment to get to know us, we can be your loyal and awesome partner!

Transfer order to be fulfilled by POPCUSTOMS,

  1. It is free, easy and fast to transfer when you get your order.
  2. You don’t need to change store’s listings, which is a huge help for products that already have top-ranking and reviews.
  3. When your sales reach a certain amount, you will get $50-$300 coupon for branding your existing orders.
  4. Free photography service for the first 10 orders.

Let’s take Etsy order as an example to record a video tutorial to show you how to make it step by step.

Firstly, please make sure you have connected your store with POPCUSTOMS.
If you have problems with the connection, please refer to our Integration Tutorial

STEP 1 – Click “go to dashboard” to open “Stores” page , click “settings” of the store, remove the tick – “Automatically remove orders which designs not created on POPCUSTOMS”, and click “Confirm” to save change. https://popcustoms.com/stores/

STEP 2 – Click “Orders” to Open “On hold” page, find the order needs to be connected.

STEP 3 – Click “Connect this design” – “Products” – search for the corresponding product, select attributes customer ordered and click “Connect and design”. Then, upload your images to design the product, click “Connect and design” on the top right to save. If you have already created this design before on POPCUSTOMS, please click “My designs” to select it.

△NOTE ①: The attributes cannot be changed after you designed, so please make sure you select the correct one before click “Connect and design”.

△NOTE ②: About “If you check the box, all orders of designs with the same SKU will also be automatically connected.” Let’s take an example to understand this rule: You receive an order with “14 inch School Backpack”, you created the design on POPCUSTOMS and it is assigned to an exclusive POPCUSTOMS SKU “7W0QQK2W-1”. Next time, if you receive another order with “14 inch School Backpack”, we will automatically connect this order with your finished design, so you will see it on “On hold” page, you just need to submit and pay.

STEP 4 – Check the product attributes again and click “Confirm connection” to select shipping method and pay the order.

That’s all. Interested in learning more? Contact us now!

Q: How to place a warehouse order and store it in POPCUSTOMS warehouse?

Store your products and branding options in our warehouse to save fulfillment time for your drop shipping orders in peak season.

一. Create Warehouse Order

Head to Dashboard -> Warehouse -> Warehouse Orders -> Create Warehouse Order to place your warehouse order.

二. Choose Designs & Add to Warehouse Shopping Cart

Add your designs, branding options, or Sotocool designs to the warehouse shopping cart.

三. Place Warehouse Order

Click the Confirm button, you’ll be driven to the shopping cart details page. You can increase or decrease the quantity of the designs that you selected, delete, or add designs to the shopping cart.

Once you confirm everything, you can place your warehouse order.

Click here to place your first warehouse order now!

Something important to know:

① Since we can’t know the quantity and the types of your warehouse order, we can’t give an estimated fulfillment time for your reference. However, you’ll get an email once we complete it.

② When you place a regular order and the items in this order are stored in our warehouse, we’ll ship the items from your inventory and deduct the cost of the items from the current payment.

Q: Can different branding options be applied to all products?

Different branding materials can only be applied to some specific products. You can filter and choose the branding materials which can be applied to your products. For example,

1) If you would like to design some branding materials for your shoe orders, you should tick General Brands and Shoes Brands, only these two types of branding materials meet your need.

2) For your other general order except for shoes, you should tick General Brands only and select the branding materials you want from them.

3) As to the Gift card, it suits all general orders.

Q: How do I add my billing information to my order invoice on your website?

You are allowed to download the invoice for each order and the monthly invoice for the one-month order. To add your billing information to our invoice, please go to your POPCUSTOMS Dashboard -> Account Settings-> Profile to fill in the Bill Name and Bill Address.

Here is an invoice sample for your reference,

Invoice Sample

Q: How to edit my order after it comes into POPCUSTOMS?

After your orders come in, you are still able to edit the order’s information like the product’s size, color, quantity, and design. However, please be sure that the product of your order is,

1) your design instead of our Sotocool design;

2) active on our website;

3) designed after Aug. 1st, 2022

Please follow the steps below to know how to edit your order if needed.

Step 1: Find your order to edit

Go to Dashboard -> Orders -> On hold to find the orders synced from your store, click the order number to see the order details and click Edit order to continue.

Step 2: Edit the order

① Edit basic product information

You can change the color, size, and quantity of the order. If your customer customizes a name or a text, you will see the customized text in the Note place.

 Edit the design

Click the Replace button to redesign and replace this product with your customers’ customize info.

After adding the customized text, click the Replace button in the right upper corner to save and replace it.

 Edit to add products to the order

When you occasionally need to add additional products to an order that has been synced to our site, click the Add product button to make it happen.

You can add products from My Designs or click Products to create a new product from scratch to add, you can also choose products from our Sotocool Designs.

Step 3: Save the changes and pay

Please don’t forget to click the Confirm button to save your changes and choose the shipping method again before you submit this order to pay.

That’s it!

Q: What price is shown on the shipping label?

No price is ever displayed on your shipping label for orders that shipped via YunExpress, 4PX, J&T, YDH, or DHL. However, for orders that shipped via EMS, there’s a price shown on the outside of the package due to shipping regulations.

Regarding orders that shipped via FedEx to other countries except for the US, there’s no price shown on the shipping label. However, there’s an invoice attached due to shipping regulations.

Q: Can I duplicate my existing designs on POPCUSTOMS?

Sure thing. You can duplicate your designs on POPCUSTOMS, edit the copy to change or add designs or make changes to selected variables (i.e. size, color, description, branding options).

Follow the steps below,

1- Go to Dashboard -> My Designs

2- Switch to List Mode

3- Click the Duplicate icon

4- Edit the design to update it or save it as a new one

5- Click Publish to change the selected variables

That’s all.