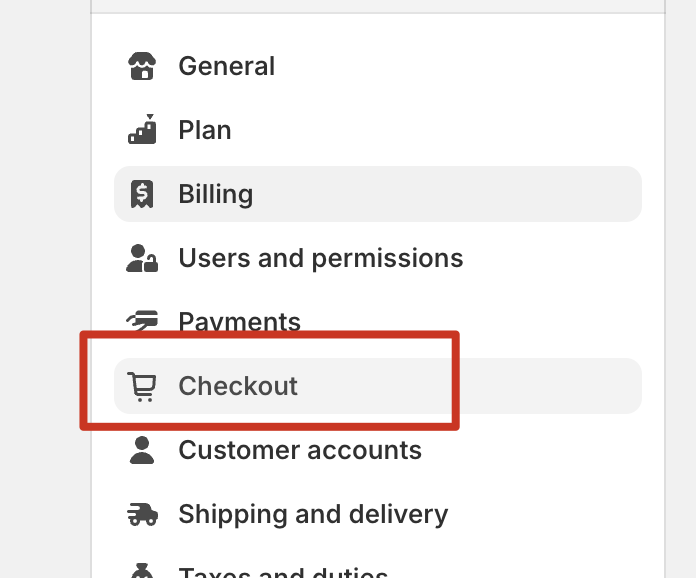
Please go to your Shopify store admin page, click Checkout, and scroll down to find the Shipping address and phone number, choose Required. Save the change, that’s all.
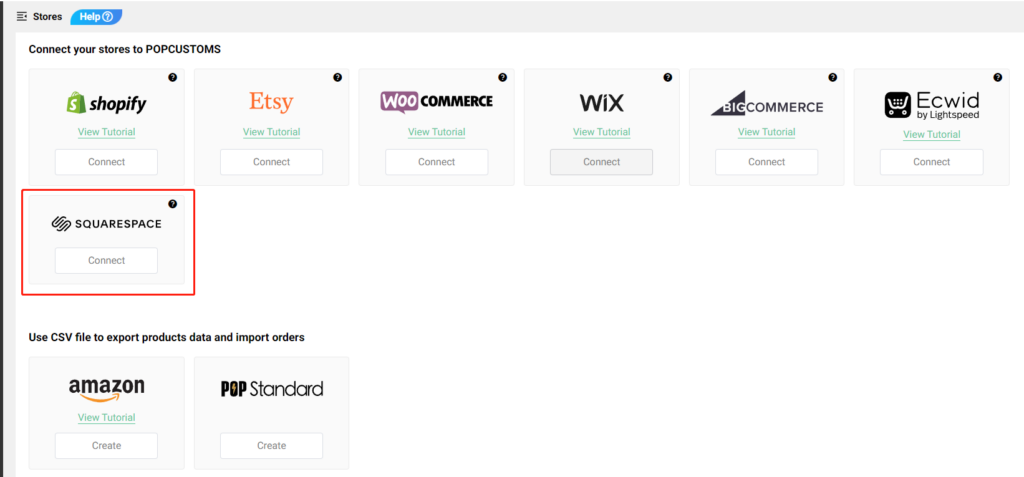
Log into your POPCUSTOMS account, go to Stores to find the Squarespace, and click the Connect button to get started.
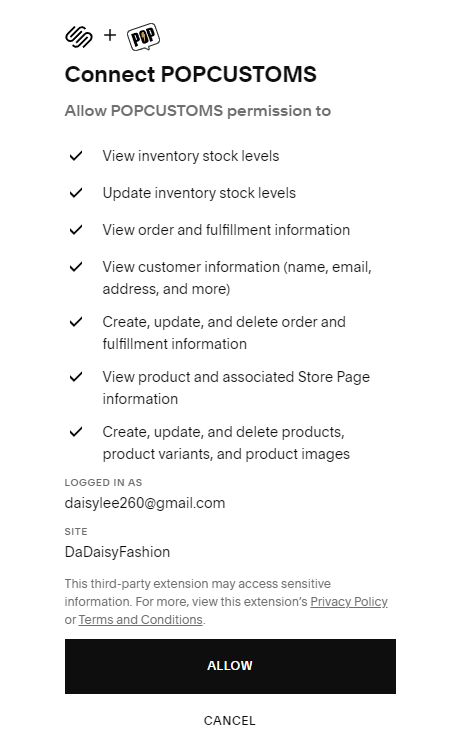
Click Allow to authorize the connection.
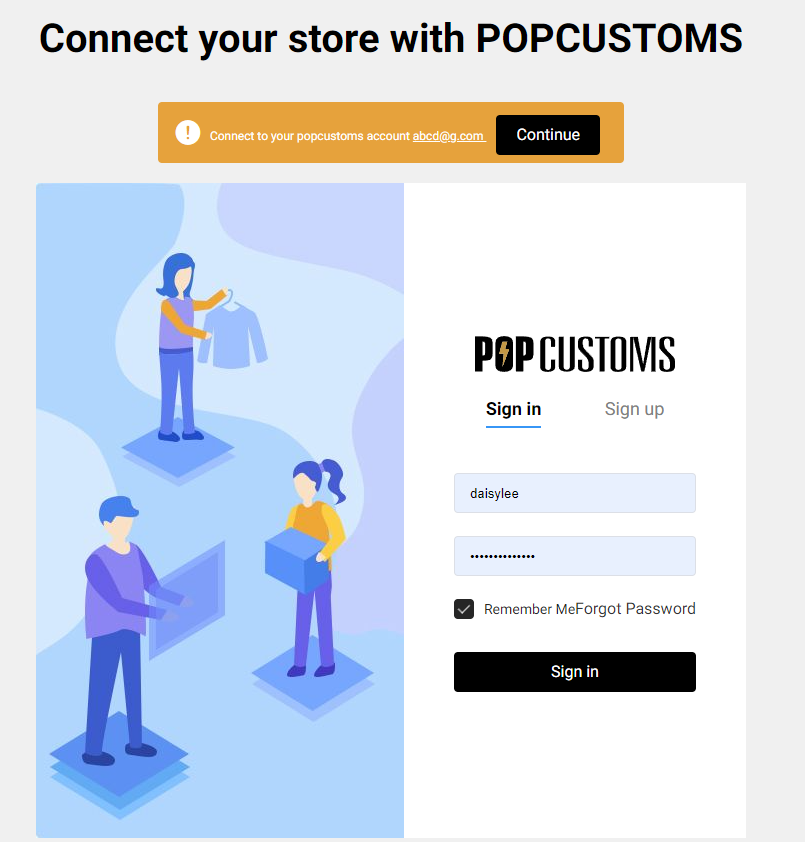
Then click the black Continue button to move forward,
Finally, click the black button to authorize.
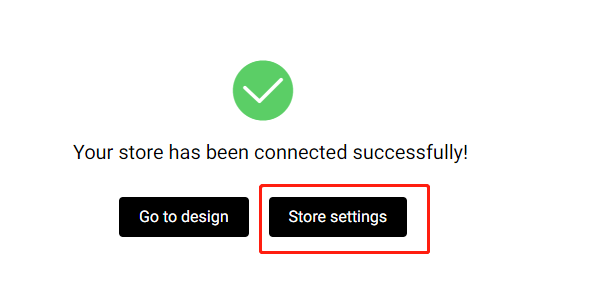
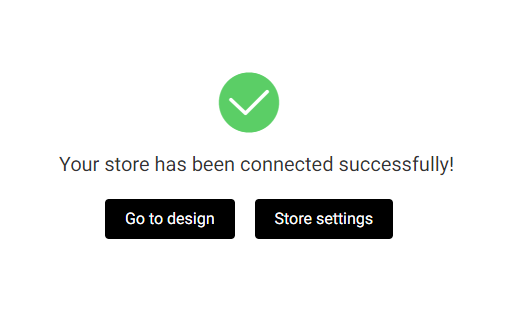
Step 3:Complete store settings
After connecting, we suggest you go to Store settings to confirm the currency settings first. The currency must be the SAME as that you use in your Squarespace store. This is requested if you want to publish products from our website to your store.
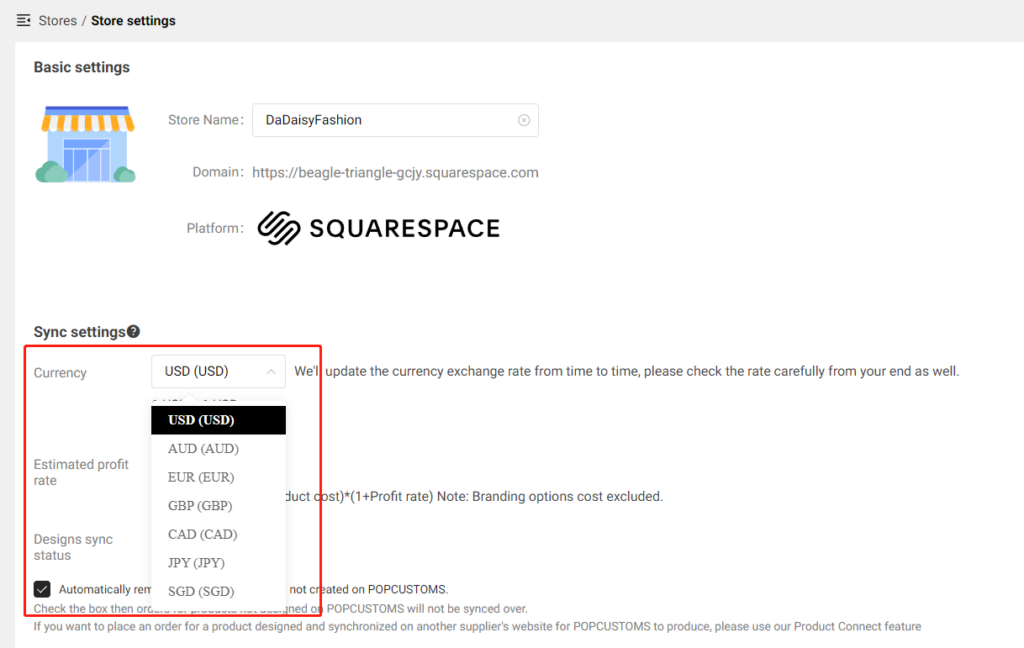
Click Store settings to find Sync settings -> Currency, and choose the currency you used in your store. We have USD, AUD, EUR, GBP, CAD, JPY, and SGD for you to choose from.
When you change the currency, the price of products that you published from our site to your store will be converted automatically from USD to the currency you choose.
You can configure the Shipping settings and Billing method settings here as needed, it helps you save time to process order payments.
Step 4: Create designs and publish to store Now you can pick products to design and publish them to your store to start selling with us!
Something important to know,
When your orders are shipped out, we send an email to the recipient by default. The email will be sent on behalf of the seller’s store and will never contain any information about POPCUSTOMS. If you don’t want us to send this email to your customers, please go to Store settings -> Tracking notification settings to uncheck the box so the email will not be sent to your customers when orders are shipped.
Don’t support updating mock-ups; Don’t support syncing combined products temporarily; Don’t support publishing personalized products to Squarespace stores.
We’re excited to announce that you can integrate your Ecwid by Lightspeed store to sell with us with a few simple steps!
Step 1: Sing up on POPCUSTOMS
Step 2: Connect your store
Step 3: Publish products to your store
Follow the steps below to set up the integration between your Ecwid by Lightspeed store and our POPCUSTOMS.
Step 1:Sing up on POPCUSTOMS
First of all, you should have accounts both on POPCUSTOMS and Ecwid by Lightspeed. Your Ecwid by Lightspeed store plan has to be Business or above to continue.
Step 2: Connect your store and configure store settings
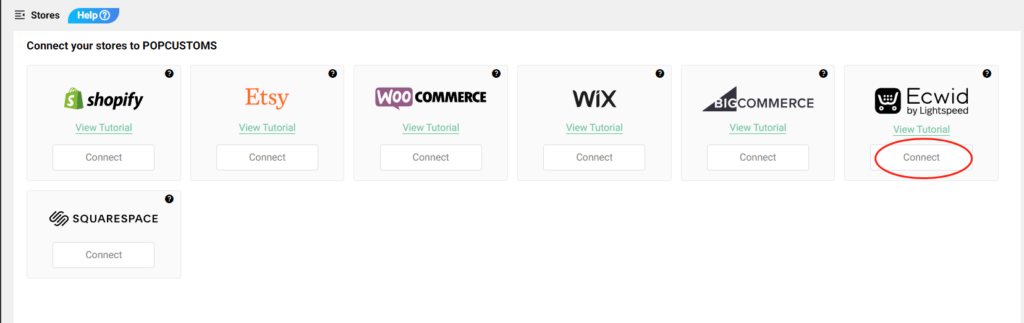
Go to Dashboard on POPCUSTOMS, click Stores to find Ecwid by Lightspeed and click the Connect button to get started.
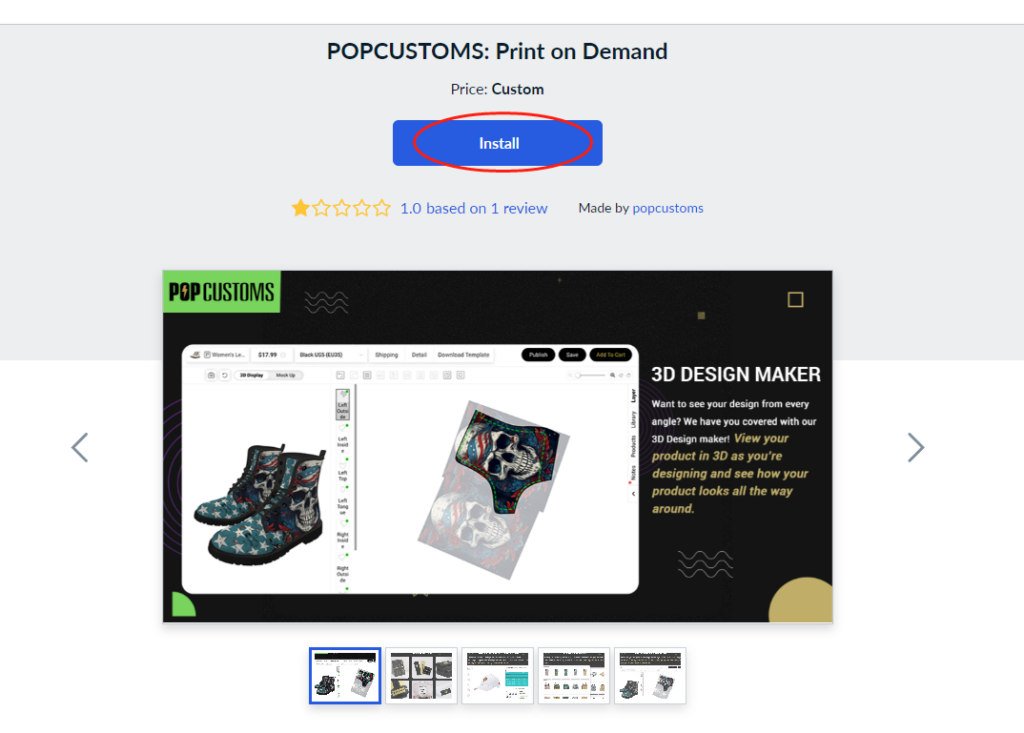
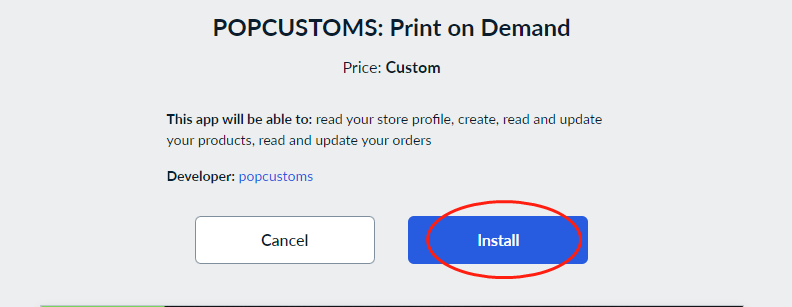
Then you’ll be driven to a new page to install our App, click Install.
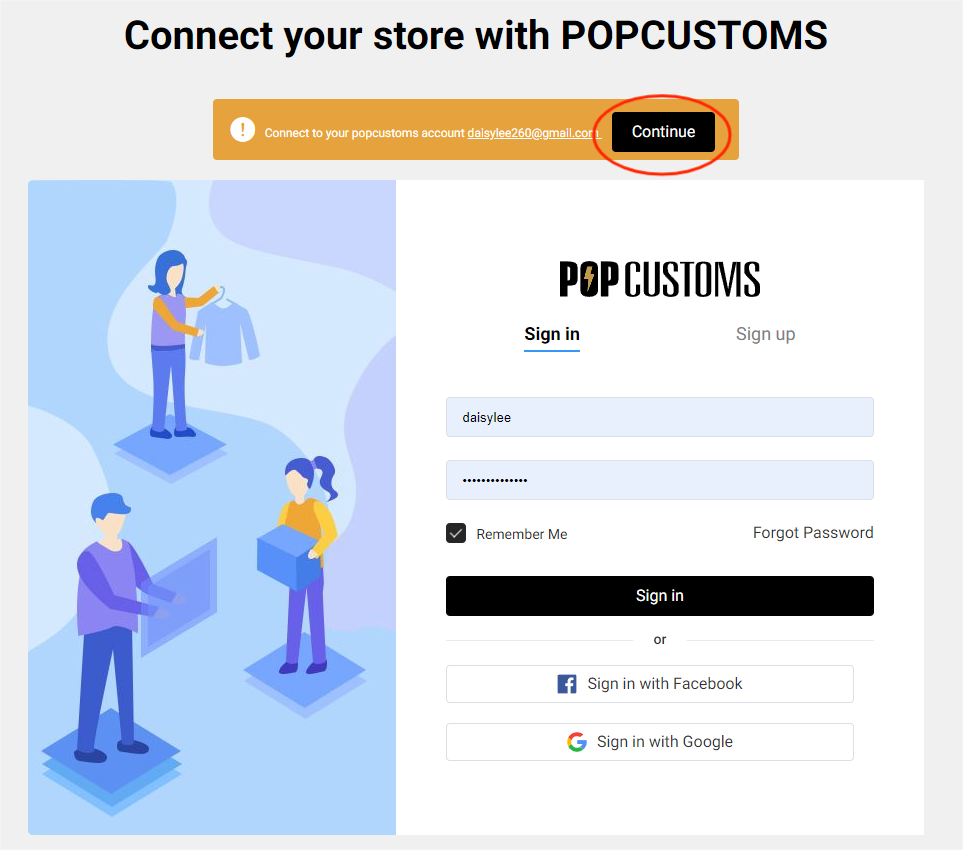
Wait a moment and the page will automatically jump to the next step then you can click Continue to move forward,
Finally, click the black button to authorize the connection.
After connecting, you can go to Store settings to configure Shipping settings, Sync settings and Billing method settings for your Ecwid by Lightspeed store as needed.
Step 3: Publish products to your store
Now you can pick products to design and publish them to your store.
First of all, you will have to plan the design to decide which parts are open for personalization by customers. There are two design styles recommended: ①Replace Heads ②Replace Objects
How to Configure ‘Replace Heads’ Products and Sync to Your Etsy Store?
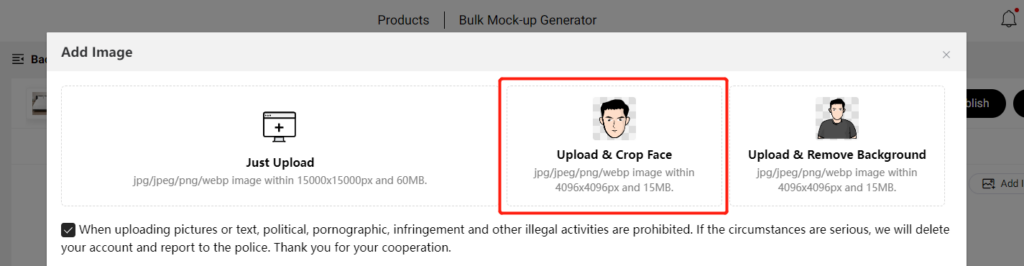
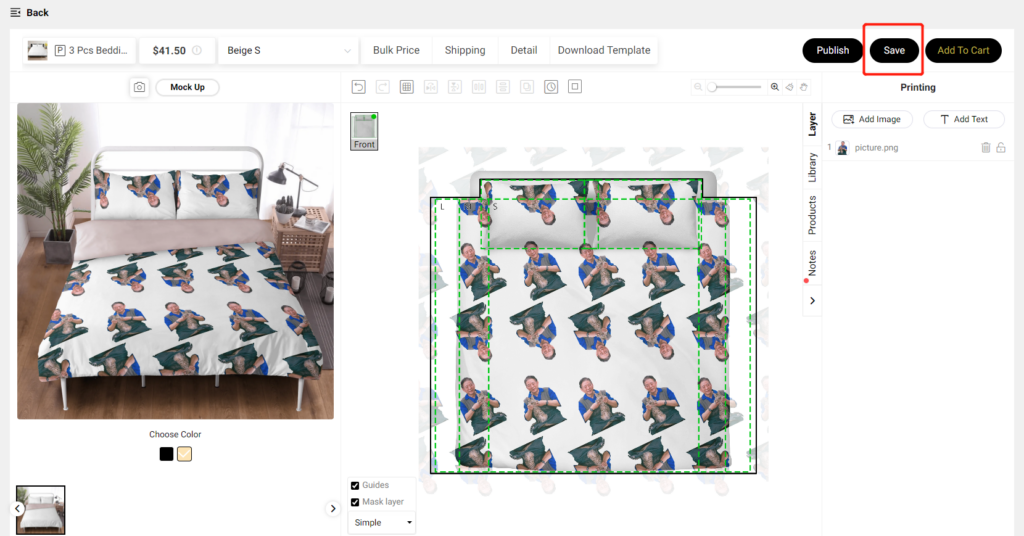
1 – Select a product you want to design, click ‘Upload & Crop Face‘ to upload images and save your design after you complete it.
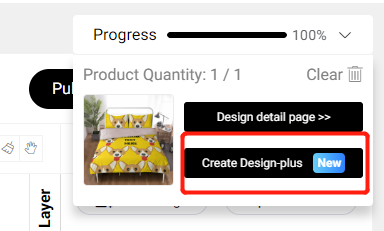
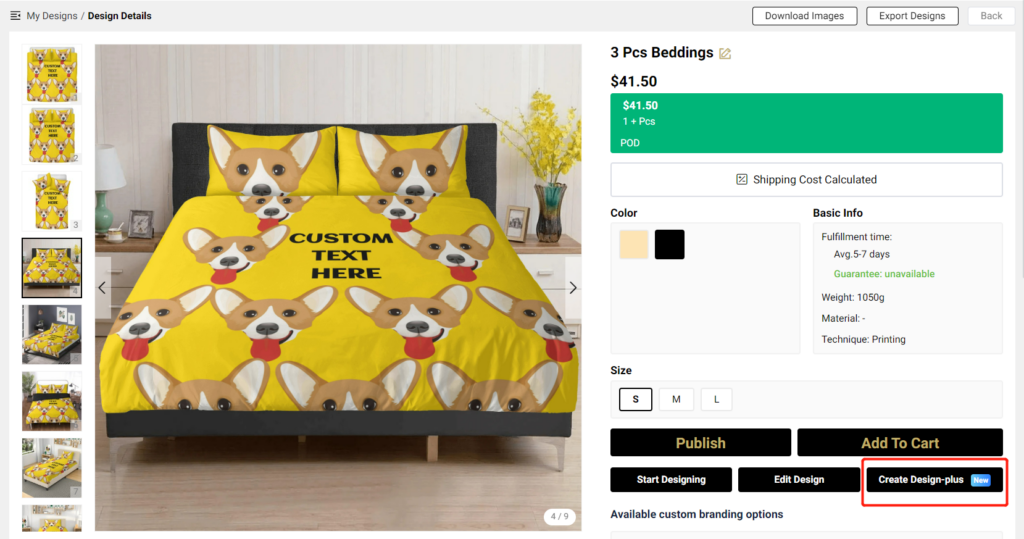
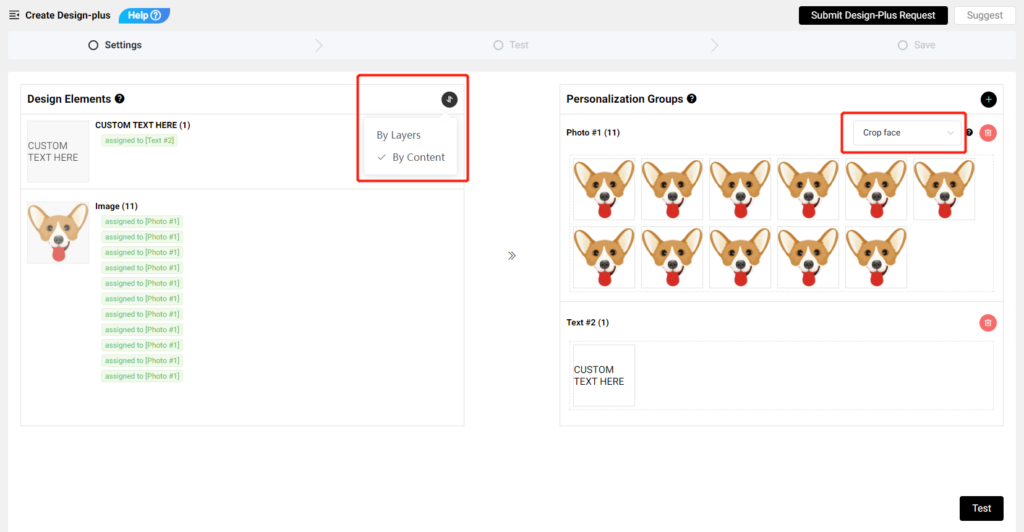
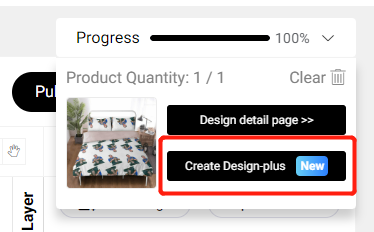
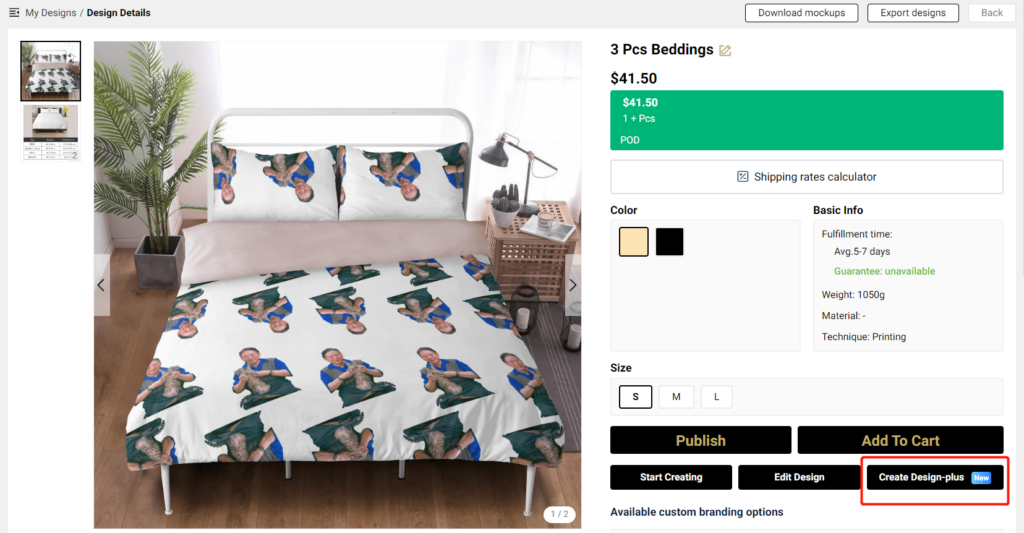
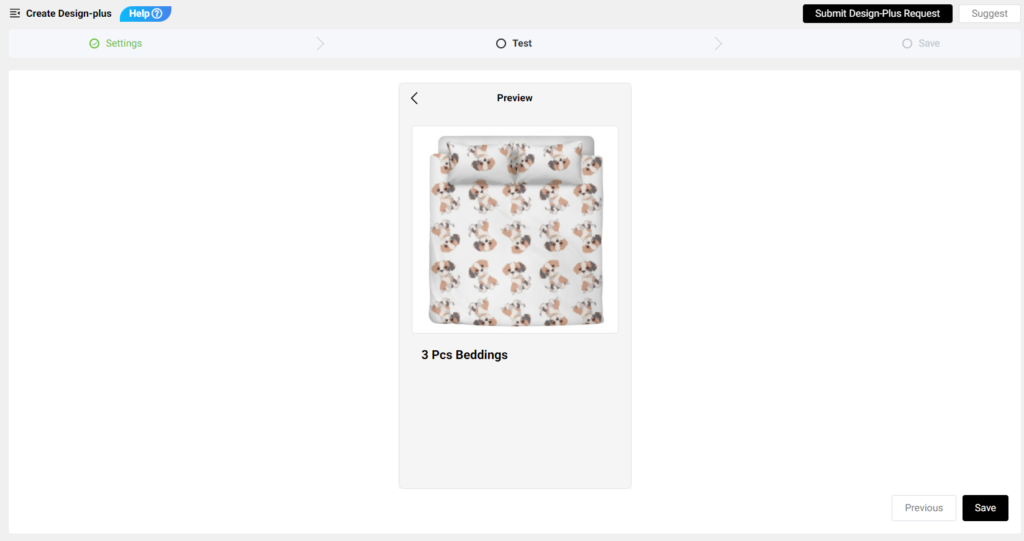
2 – Click ‘Create Design-plus‘ on the design page, or go to ‘My designs‘ – ‘Design details‘ page, and click ‘Create Design-plus‘ to start configuration.
3 – Drag and drop images or texts from the left to the right to configure personalization areas. Dragging them to the right and placing them on the same row means that they will be replaced by the same image uploaded by your customers.
* On the left, you can choose to sort your design elements By Layer or By Content.
* Choose ‘Crop face’ to make sure the image uploaded by your customers will be automatically cropped to fit the design area perfectly.
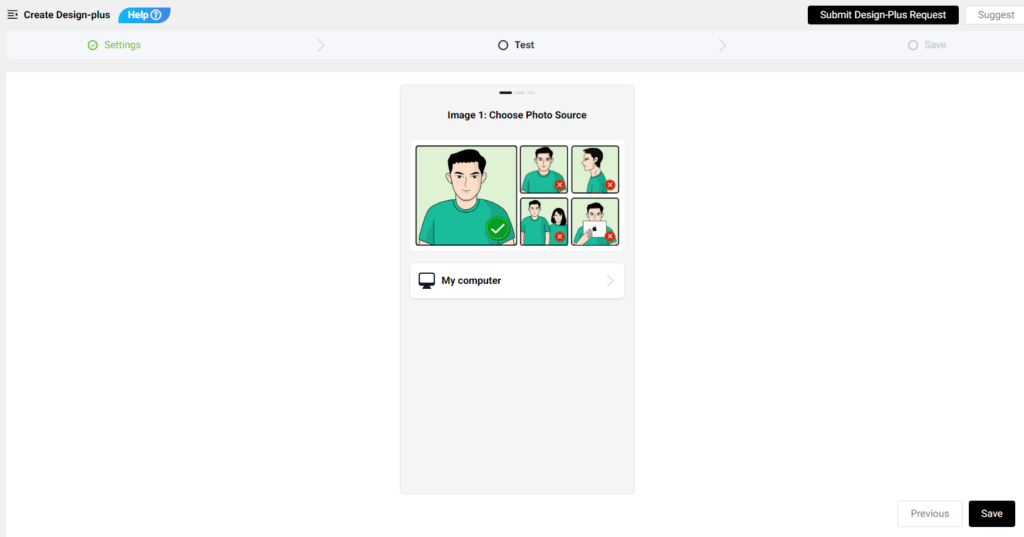
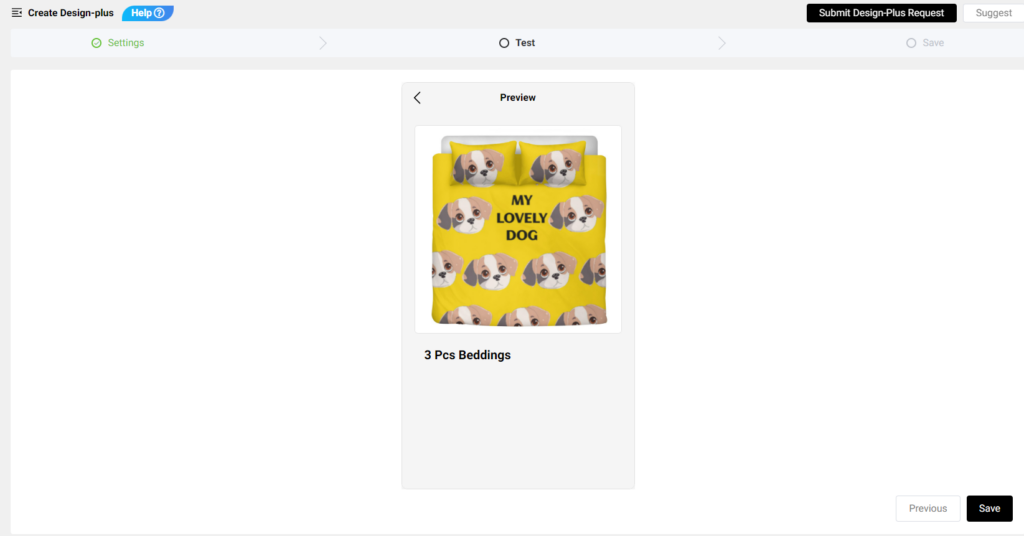
4 – Upload a picture to test if the configuration result meets your need. Save it if you are satisfied with the test result.
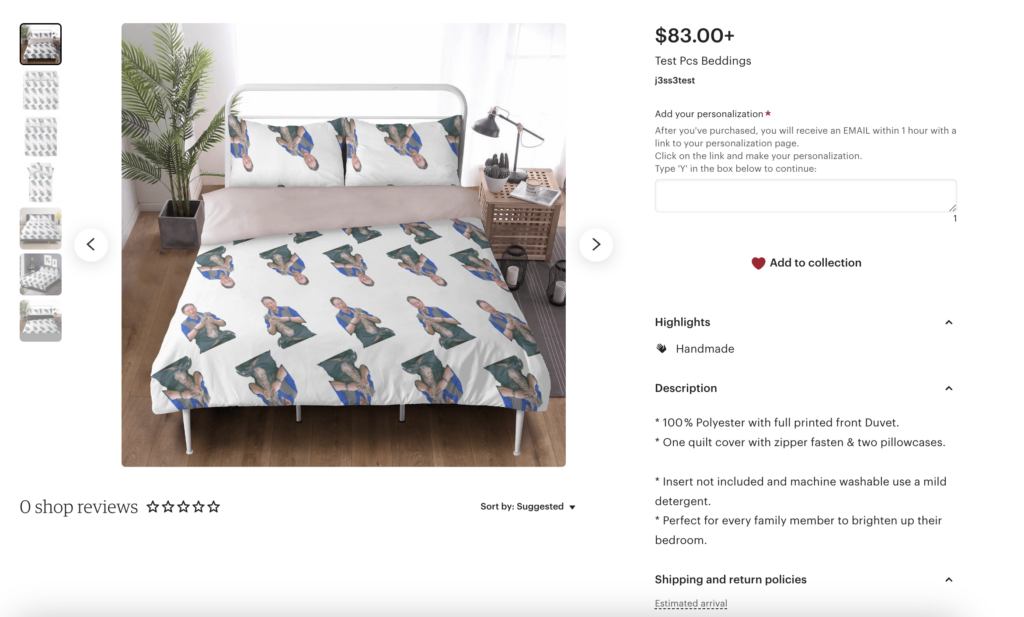
5 – Publish it to your Etsy store, turn on the ‘Personalization’ button, and set it active for your customers to personalize.
How to Configure ‘Replace Object‘ Productsand Sync to Your Etsy Store?
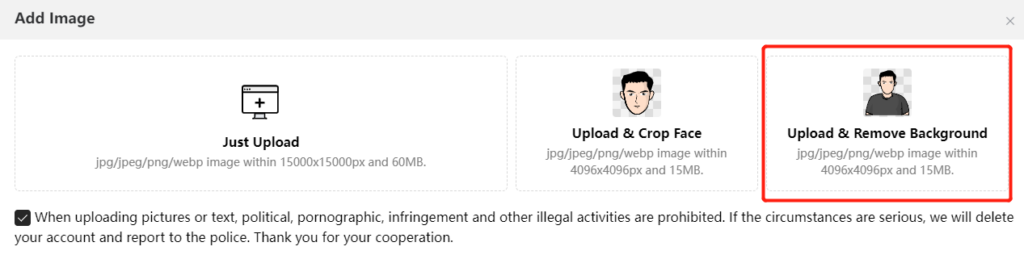
1 – Select a product you want to design, click ‘Upload & Remove Background‘ to upload images and save your design after you complete it.
2 – Click ‘Create Design-plus‘ on the design page, or go to ‘My designs‘ – ‘Design details‘ page, and click ‘Create Design-plus‘ to start configuration.
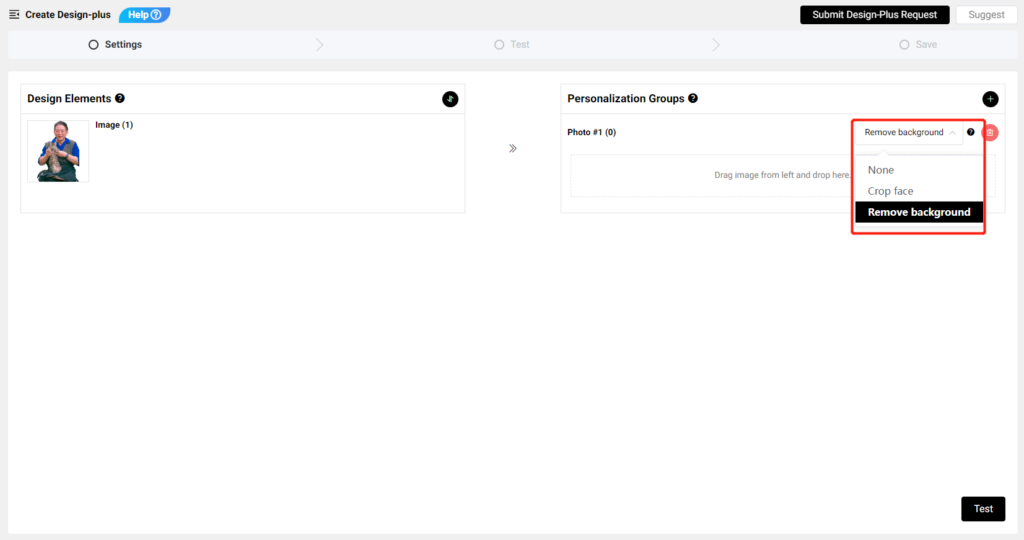
3 – Drag and drop images or texts from the left to the right to configure personalization areas. Dragging them to the right and placing them on the same row means that they will be replaced by the same image uploaded by your customers.
* On the left, you can choose to sort your design elements By Layer or By Content.
* Choose ‘Remove background’ to make sure the background of the image uploaded by your customers will be automatically removed to fit the design area perfectly.
4 – Upload a photo to test if the configuration result meets your need. Save it if you are satisfied with the test result.
5 – Publish it to your Etsy store, turn on the ‘Personalization’ button, and set it active for your customers to personalize.
How To Order?
Your customers need to choose the attributes (size, color, etc.) and quantity they want to buy, type ‘Y’ in the personalization box, add to cart and checkout.
After they’ve purchased, the order will be synced to your POPCUSTOMS account. And they will receive an email within 1 hour with a link to the personalization page. They need to click on the link to personalize.
If they are satisfied with the preview, after they saved it, the design of the order on your POPCUSTOMS account will be replaced to their personalization design. At the same time, you will receive an email reminding you to pay for the order, after which we will start production and ship the product to your customers as soon as possible!
We previously provide only black and white shoelace options, now we allow sellers to add different color shoelace options for shoes under one listing.
Follow the steps below to know how to make it happen!
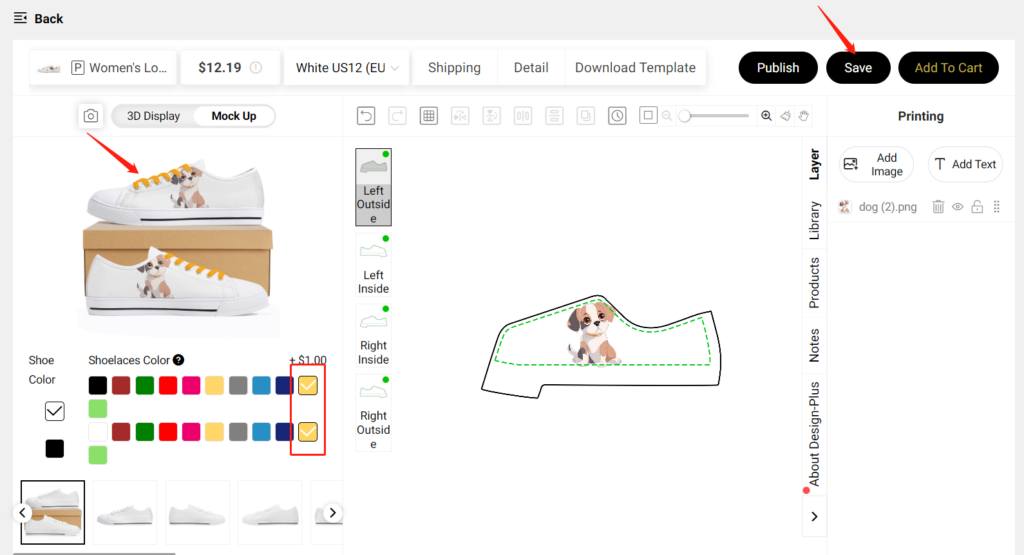
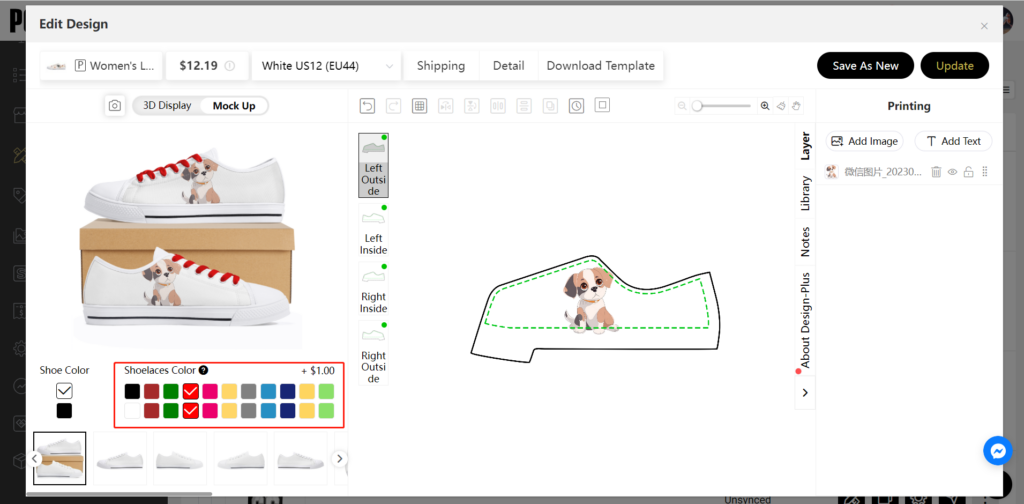
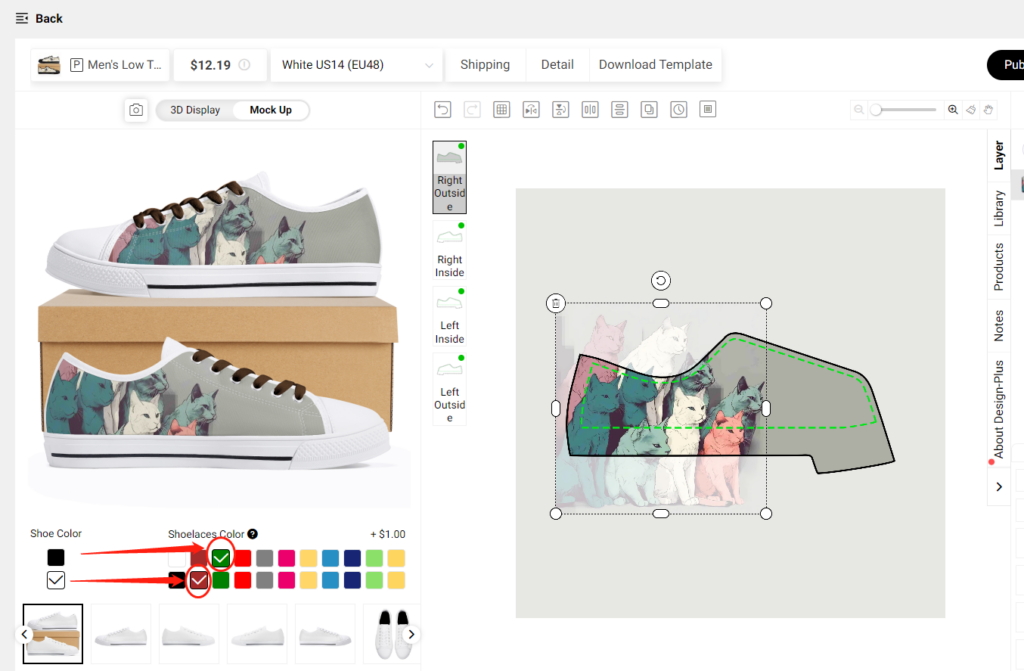
Step 1: Choose a shoelacecolor
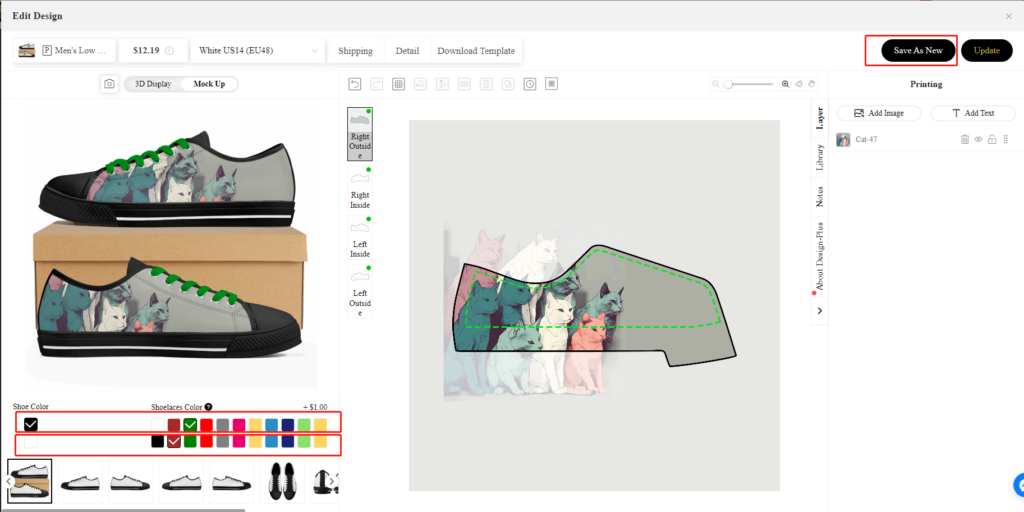
You are allowed to choose different shoelace colors for different colors of soles. For example, I choose a yellow shoelace and a red shoelace for low top canvas shoes.
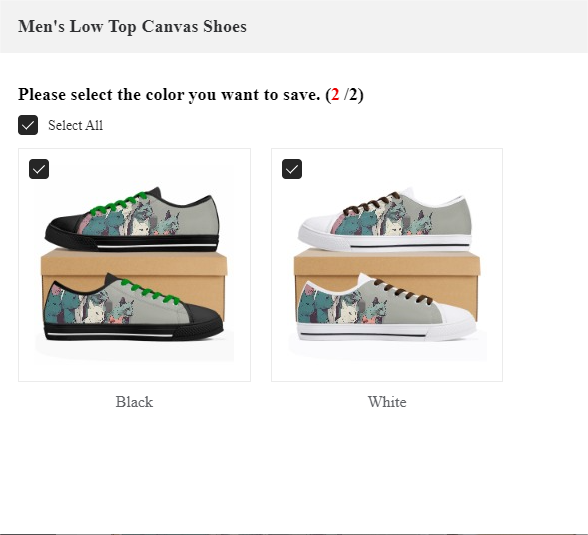
Click Save then you’ll see the mockup with the different color shoelaces.
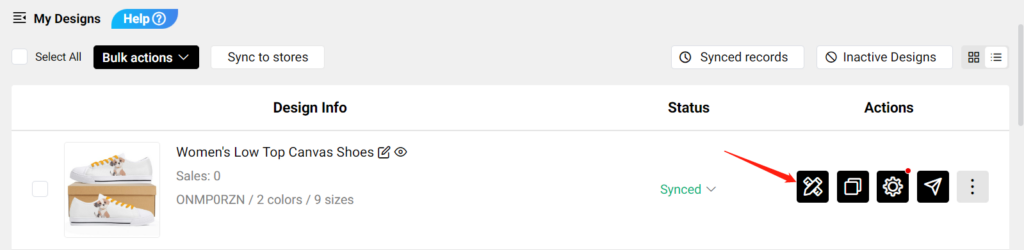
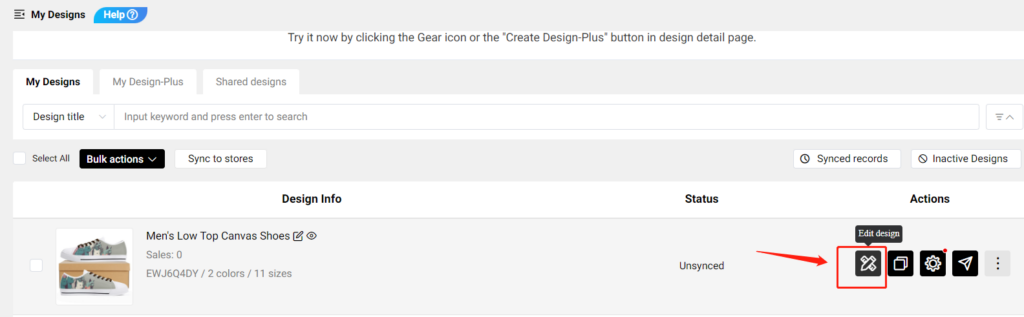
Go to My Designs to find the shoes that you saved, and click Editdesign to edit the color of the shoelace.
Change the color of the shoelace and click Save As New. In this way, you can create many shoes with different shoelace colors quickly and conveniently.
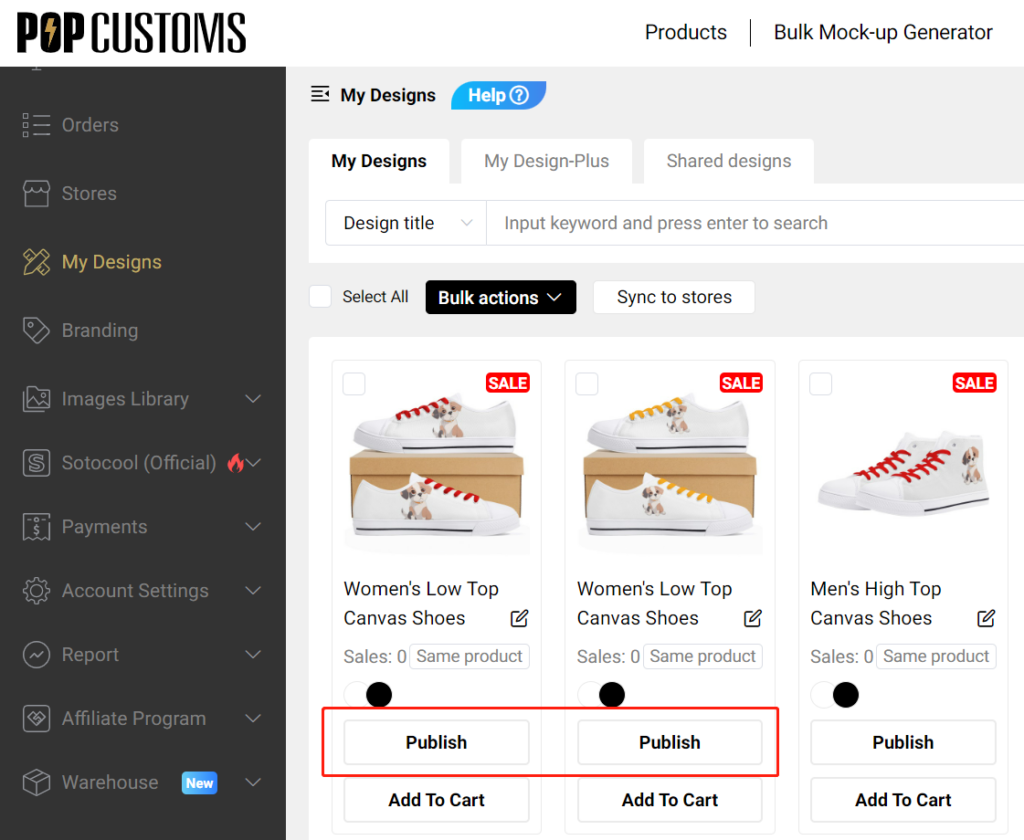
Step 2: Publish to your store
Go to My Designs, publish these shoes to your Etsy store one by one.
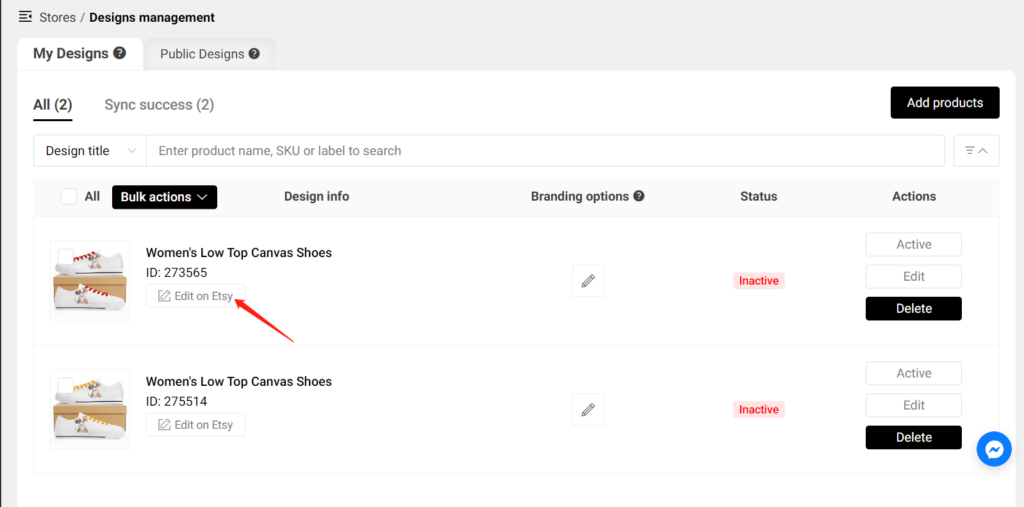
Then go to Stores – Synced designs, click Edit on Etsy, or go to your Etsy store to edit listing.
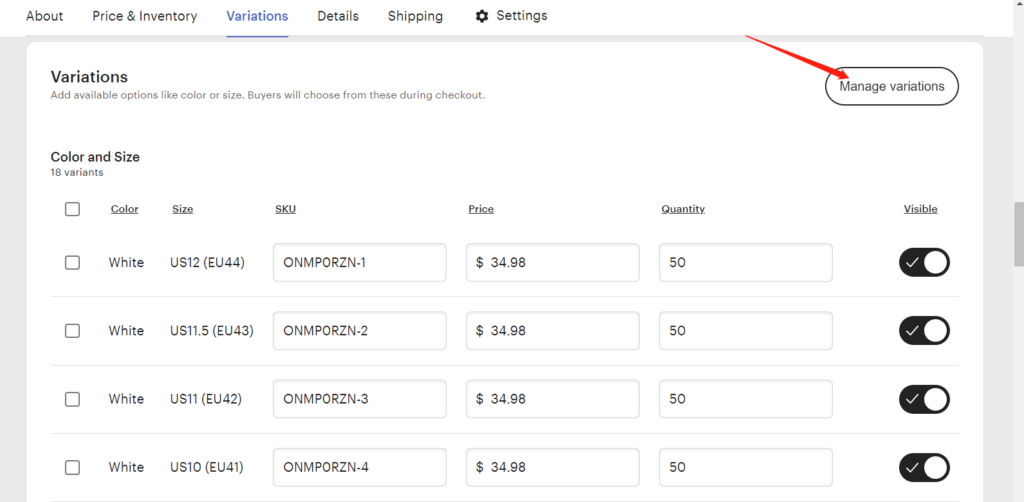
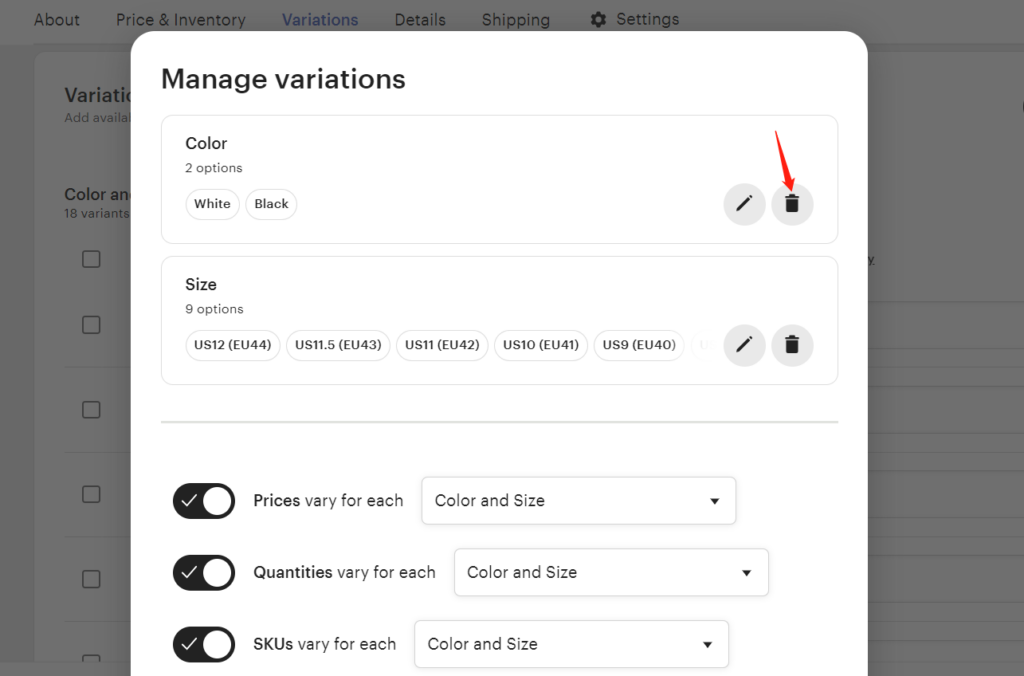
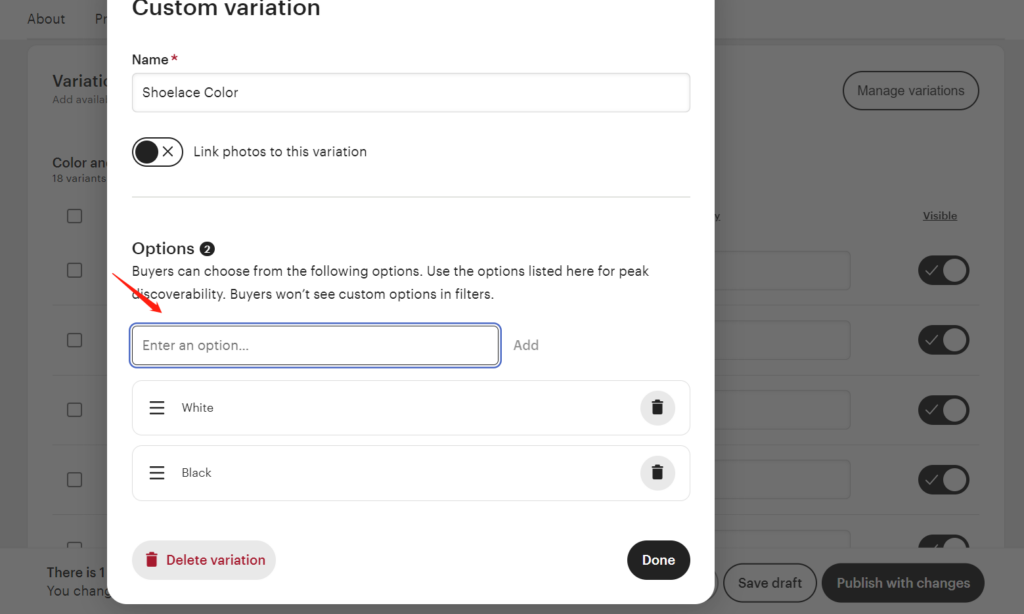
Click Manage Variations to delete original Color options and create new options in Etsy.
Add the shoelace color and sole color like “Black+color (all sizes…) / White+color (all sizes…)
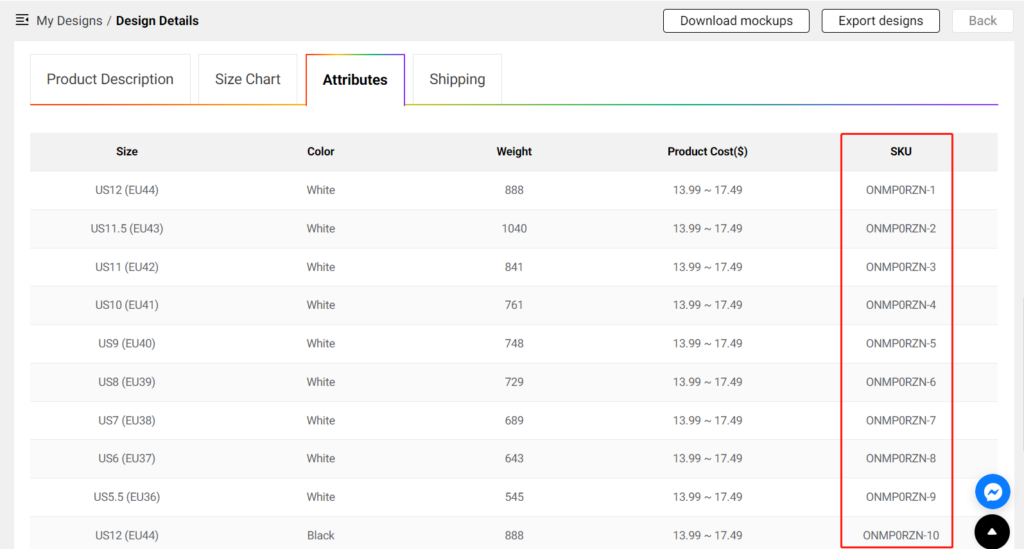
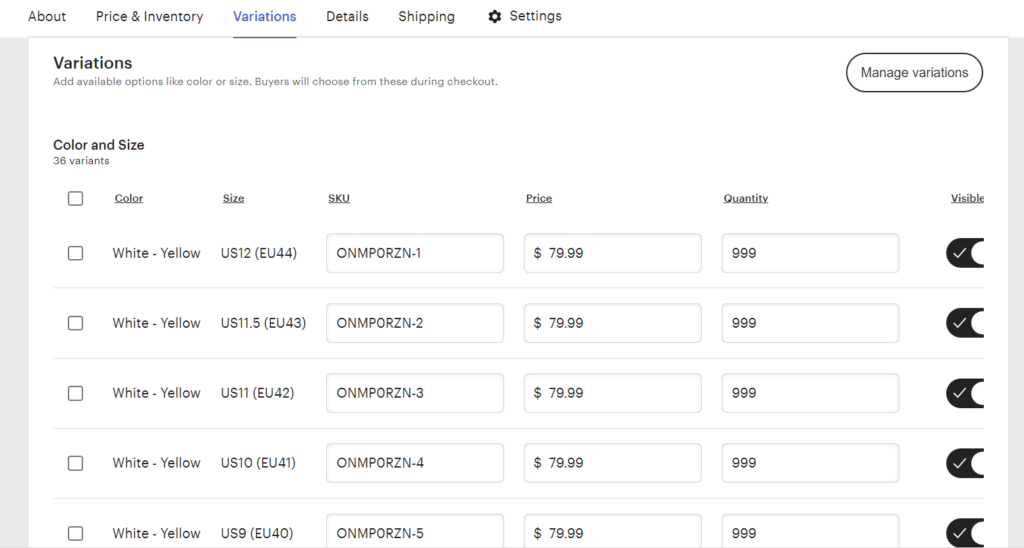
Go to My Designs – Attribute, copy each sku from POPCUSTOMS and paste to the new option.
Finally, click Publish with changes, these shoes will be combined with different colored laces and sold in your Etsy store.
*Please kindly noted that your customer will receive the shoes with the lace color they chose.
1. You should have one Shopify store to get started.
2. A platform can only authorize one store. If you want to authorize a new store on the same platform, you need to delete the previously authorized store.
Step 1: Sign up for a free account on POPCUSTOMS
Sign up for a free account by using your Email address or social media accounts.
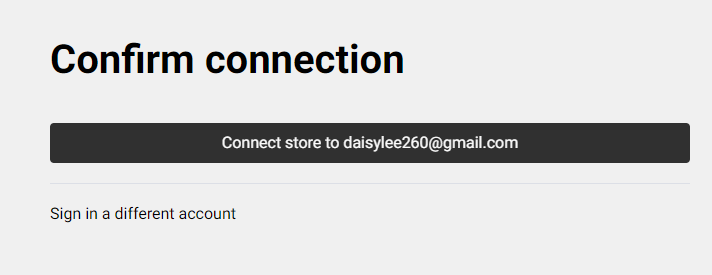
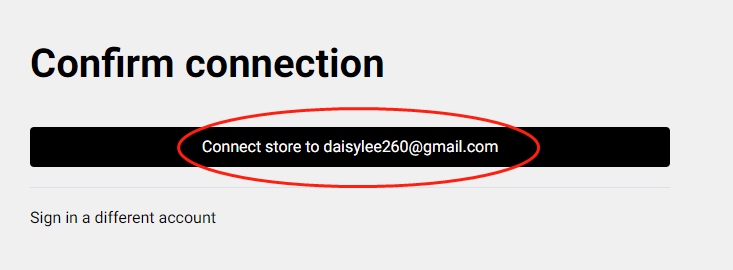
Step 6: Confirm the connection to complete the authorization.
Step 7: Add your products
To accept orders and make money you need to publish products to your Shopify store. On POPCUTOMS, you can just click Products on the Dashboard page to design and add products conveniently.
Step 8: Complete the Store settings after connection, including
1. Basic settings
2. Sync settings: ① Currency; ② Estimated profit rate; ③ Product status
We are excited to announce that you can integrate your Wix store to sell with us now!
Follow the steps below to set up the integration between your Wix store and our POPCUSTOMS.
Step 1: Sign up on POPCUSTOMS
Step 2: Connect your Wix store
Step 3: Sync products to your store
Step 4: Sync orders to POPCUSTOMS in real-time
Step 1:Sign up on POPCUSTOMS
First of all, you should have accounts both on POPCUSTOMS and Wix. If you don’t have signed up for your account on POPCUSTOMS, please register with us now.
Step 2: Connect your Wix store
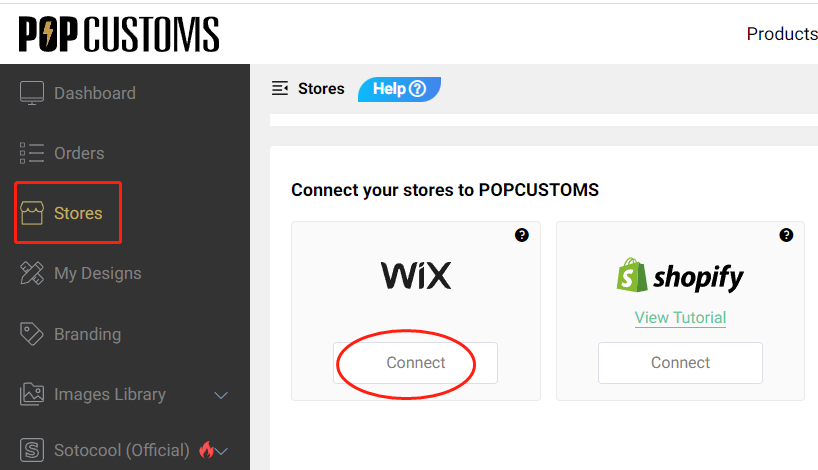
Log into your POPCUSTOMS account, go to Stores to find Wix, and click the Connect button to get started.
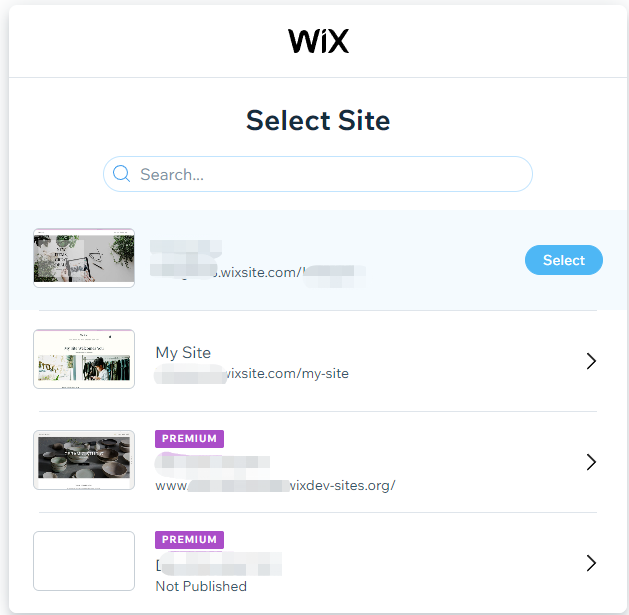
Choose a Wix store that you have to connect.
*Make sure that your Wix store is Published, if the status is Not Published, please go to publish it first.
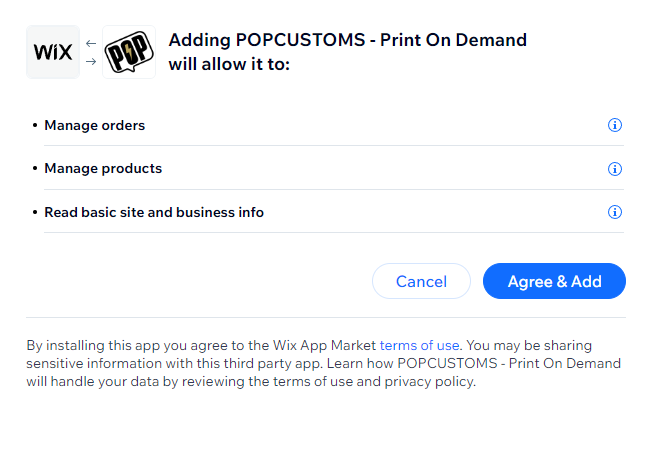
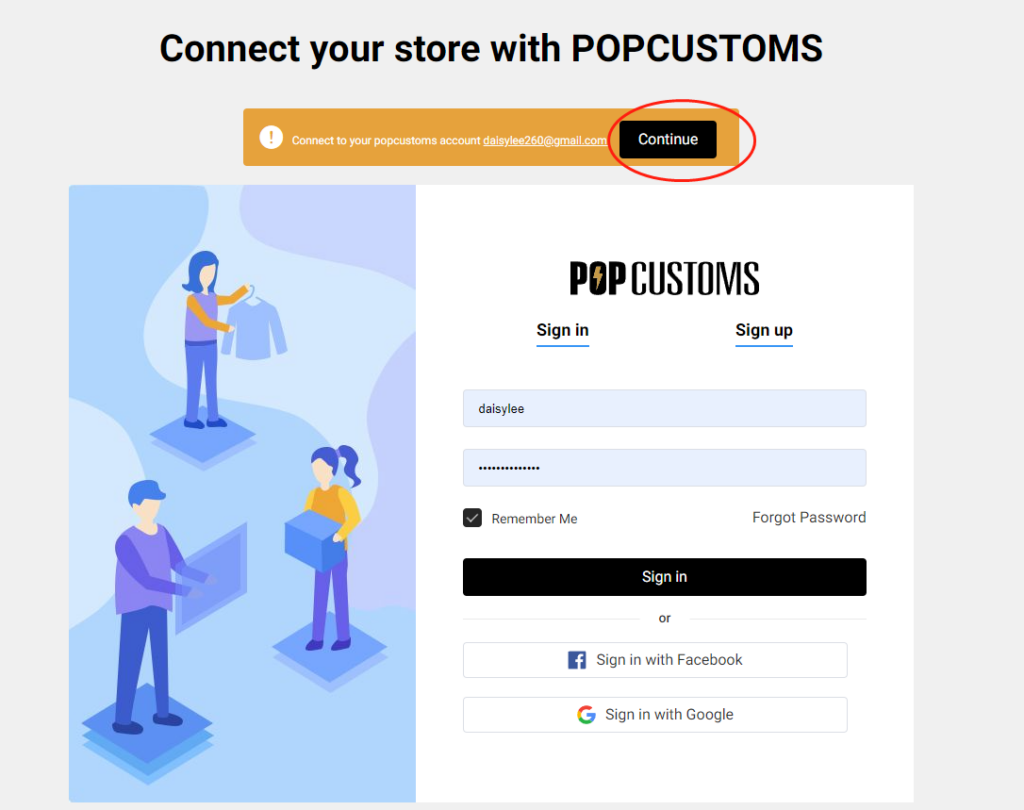
Click Agree & Add and then you’ll be driven to our site, sign in and click Continue to move forward.
Click the black line to confirm the connection between your Wix store and POPCUSTOMS.
Step 3: Sync products to your store
Go to our product page to select products to design and sync them to your store.
Step 4: Sync orders to POPCUSTOMS in real-time
When your customers place orders from your store, the order will automatically come to our site in real time.
Something important to know:
When your orders are shipped out, we send an email to the recipient by default. The email will be sent on behalf of the seller’s store and will never contain any information about POPCUSTOMS. You can check the email template by clicking Wix admin -> Settings -> eCommerce Settings -> Order email notifications -> SHIPPING CONFIRMATION. You can also uncheck the box to turn it off so the email will not be sent to your customers, or click the Edit button to edit the email notification as needed.
Don’t support updating mock-ups; Support syncing combined products but not personalized products to Wix.
Previous Wix users should integrate your Wix store again so the product and orders can be automatically synced between your store and our site.
We previously provide only black and white shoelace options, now we allow sellers to add different color shoelace options for shoes under one listing.
Follow the steps below to know how to make it happen!
Step 1: Choose a shoelace color
You are allowed to choose different shoelace colors for different colors of soles. For example, I choose a green shoelace for black outsole shoes and choose a red shoelace for white outsole shoes.
Click Save then you’ll see the mockup with the different color shoelaces.
Go to My Designs to find the shoes that you saved, and click Editdesign to edit the color of the shoelace.
Change the color of the shoelace and click Save As New. In this way, you can create many shoes with different shoelace colors quickly and conveniently.
Step 2: Publish to your store
Combine all these shoes with different colored laces and publish them to your store, set the product’s status as Draft first so you can change the value of the variants as needed.
Click here to learn how to combine products and how to modify the color value options of your shoes.
*Note: If you have 50,000 or more variants/skus in your store, you’re subject to Shopify daily rate limit: 1,000 variants/skus per day. If you’re on the Shopify Plus plan, then the limit doesn’t apply to you. For a product, you can create up to 100 variants/skus. Click here to learn more. Please contact Shopify for more info or ask for help with the variant’s limitation.
*Your customer receives the shoes with the lace color they chose.
It’s essential to note that POPCUSTOMS currently offers a shipping rate of $0.00 for products shipped to the United States, which means the prices displayed on the website include free shipping for that region. You can also configure shipping rates for other countries and regions based on POPCUSTOMS’ shipping policies.
And pls kindly note that if shipping rates are not set up, there may be display issues with out of stock/sold out after product synchronization.
Here’s a guide to help you set up shipping rates for POPCUSTOMS products in your Shopify store.
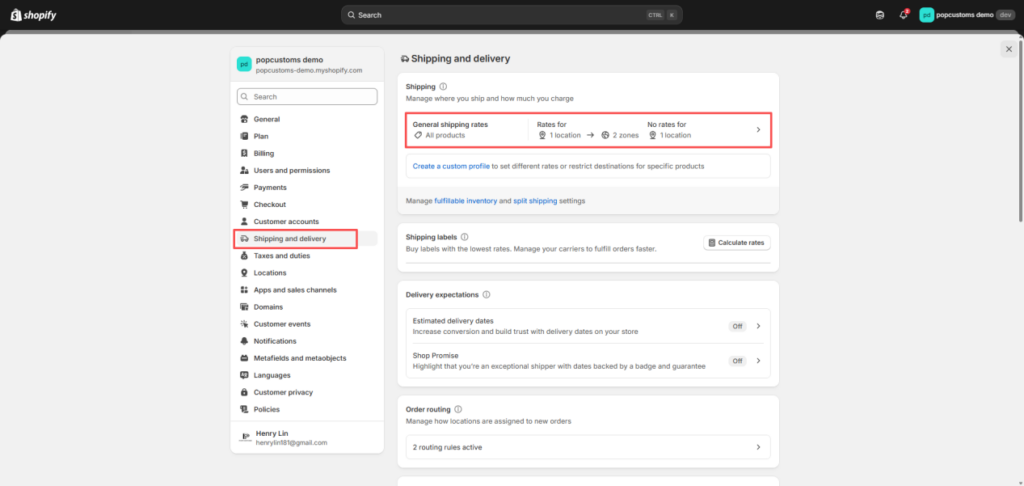
Step 1: Access Shipping Settings
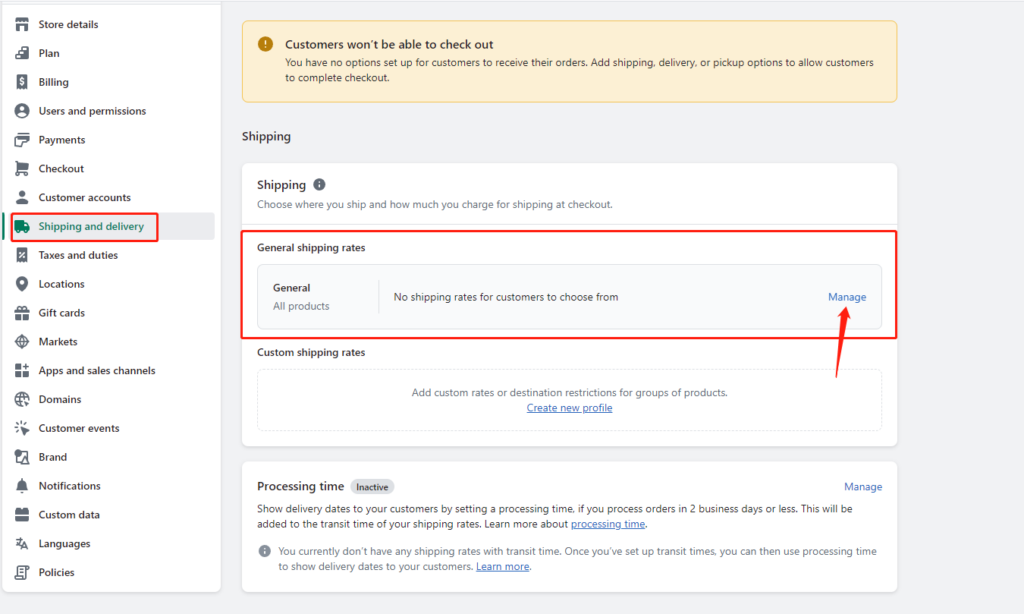
Go to your Shopify admin page. From the left-hand menu, click on the Settings option.
Then, click on Shipping and Delivery.
Shipping and delivery – General – Manage
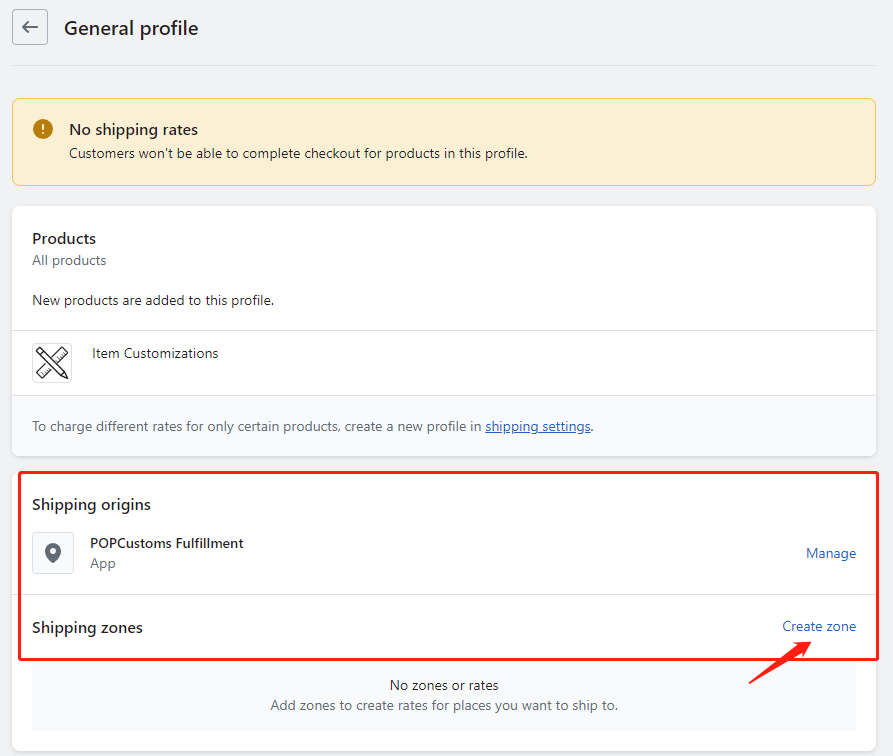
Step 2: Create or Edit Shipping Zones
In the Shipping and Delivery page, locate the Shipping Zones section.
If you already have shipping zones created, select the one you wish to edit. If not, click the Create Shipping Zone button.
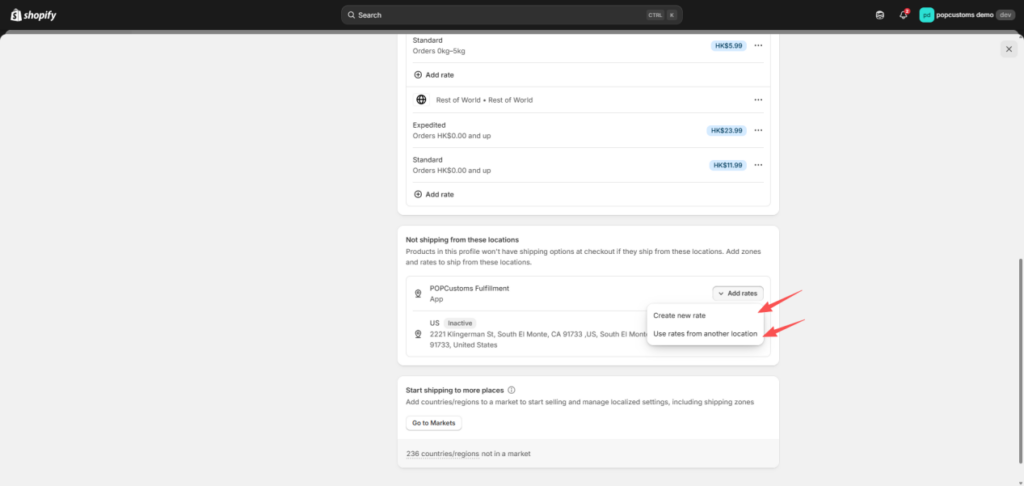
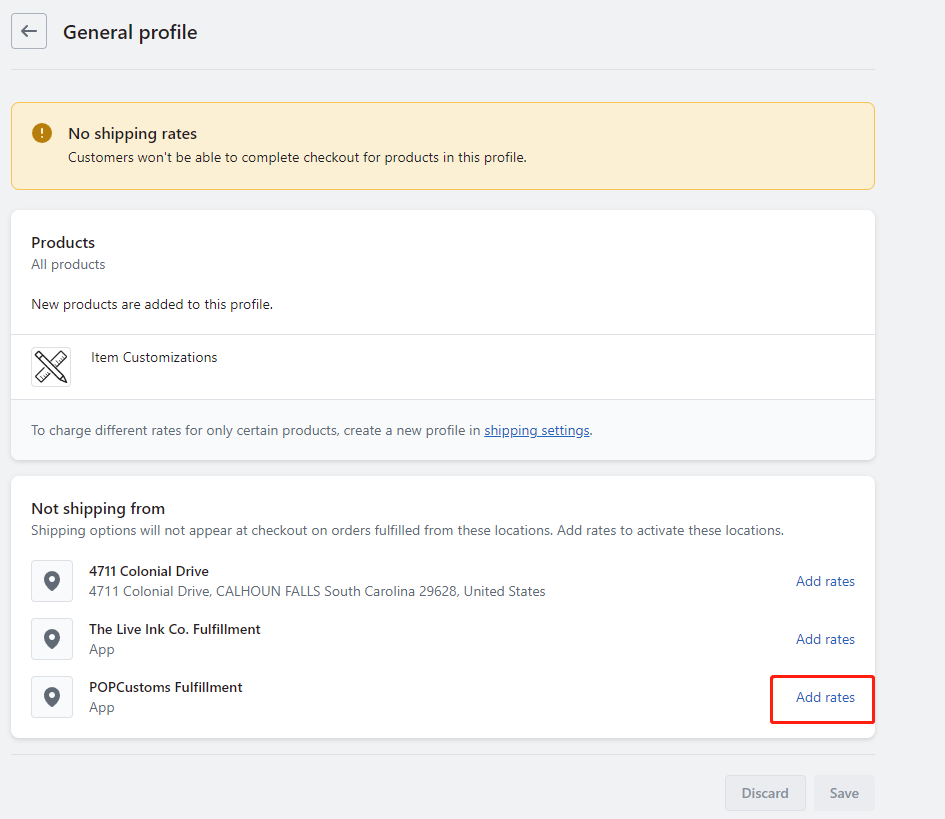
Step 3: Set Up Shipping Rates
In the shipping zone area, look for the option to Add Rate.
Click on the Add Rate button.
Example Setup:
United States:
Name: Free Shipping to the U.S.
Rate: $0.00 (since POPCUSTOMS offers free shipping to the U.S.)
Mexico:
Name: Shipping to Canada
Rate: $3.00 (set according to POPCUSTOMS’ policy)
European Union:
Name: Shipping to EU
Rate: $0.00 (set according to POPCUSTOMS’ policy)
Other Regions:
Name: Shipping to Other Countries/Regions
Rate: $9.99 (set according to POPCUSTOMS’ policy)
Download POPCUSTOMS’ product shipping rates to help you set up better shipping rates!
Step 4: Save Changes
After confirming all your shipping rate settings, don’t forget to click the Save button in the upper right corner to save your changes.
Step 5: Test Shipping Calculation
Once you’ve completed the setup, it’s a good idea to conduct a test:
Simulate a purchase in your Shopify store.
Add a POPCUSTOMS product to your cart and proceed to the checkout page.
Double-check that the shipping rates display correctly based on the selected region.
Step 6: Sync with POPCUSTOMS
Make sure you sync your product information and shipping rates with POPCUSTOMS to avoid any discrepancies:
Log in to your POPCUSTOMS account.
Ensure that your shipping-related settings are updated in your Shopify product sync records.
POPCUSTOMS Shipping Zone Information
For more details about POPCUSTOMS shipping zones, please visit this link: POPCUSTOMS Shipping Zone.
Please feel free to contact us at business@popcustoms.com if you need any assistance.