Tag Archives: introduce_my_stores

Etsy Store Integration Tutorial

Note:

1. Please follow all the steps below to authorize.

2. A platform can only authorize one store. If you want to authorize a new store on the same platform, you need to delete the previously authorized store.

Step 1: Sign up for a free account on POPCUSTOMS

Click the Sign up button in the right upper corner to sign up for a free account first.

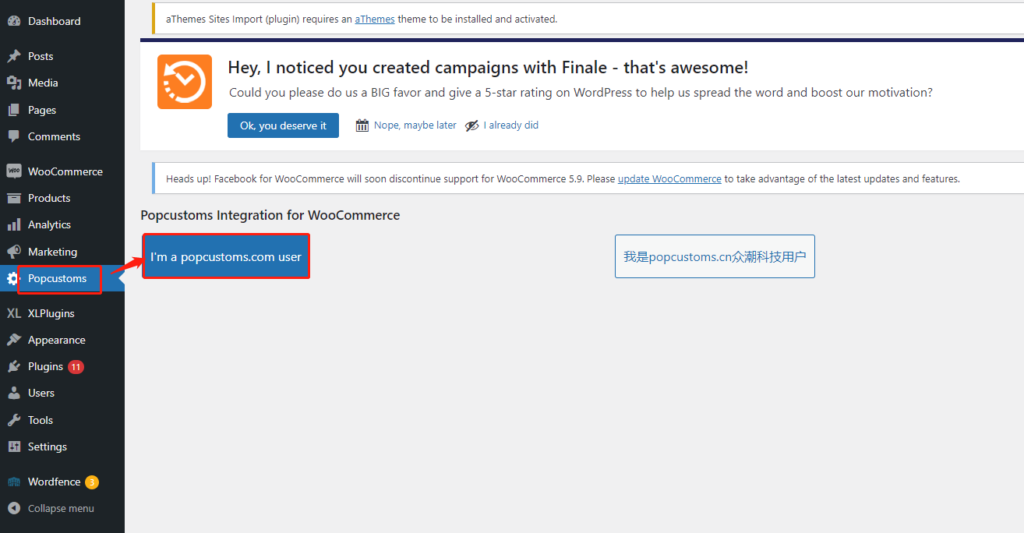
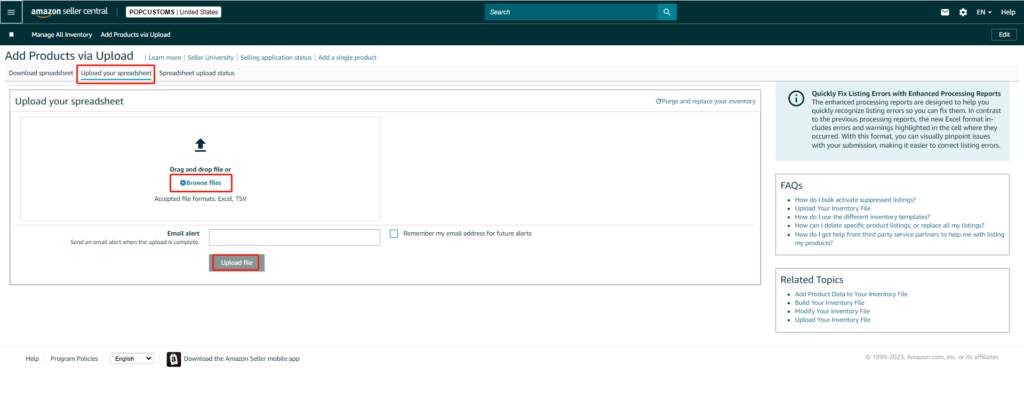
Step 2: Authorize POPCUSTOMS Etsy application

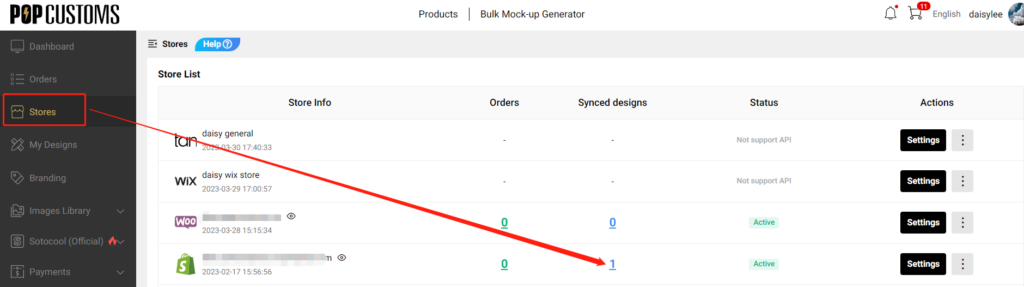
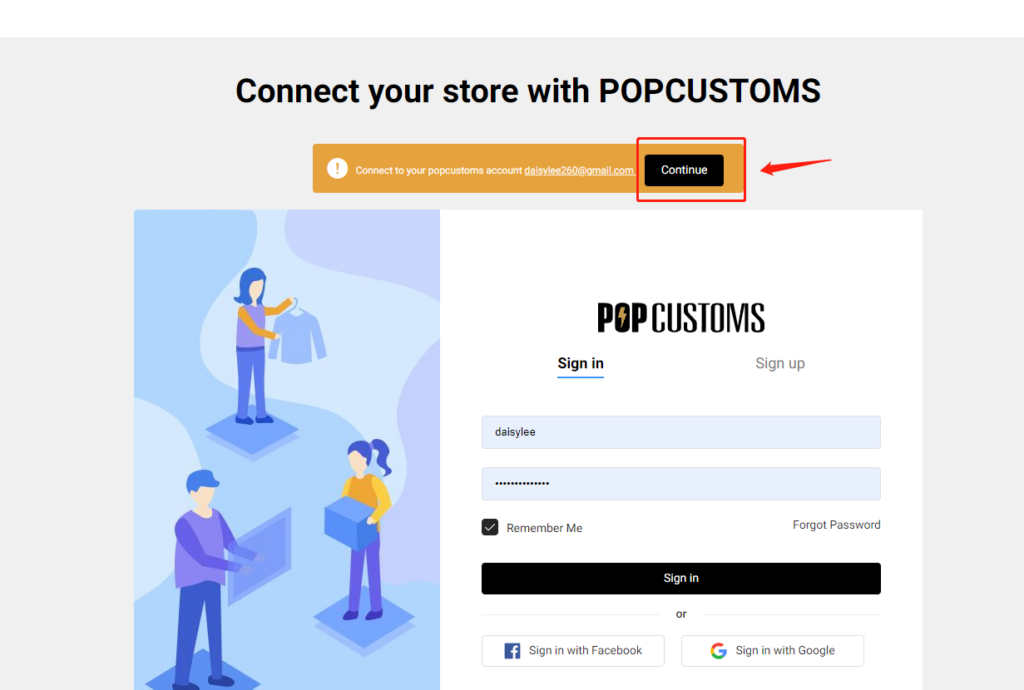
① Go to Dashboard -> Stores and click the Connect button under Etsy to authorize the connection between your Etsy store and POPCUSTOMS account.

image.png

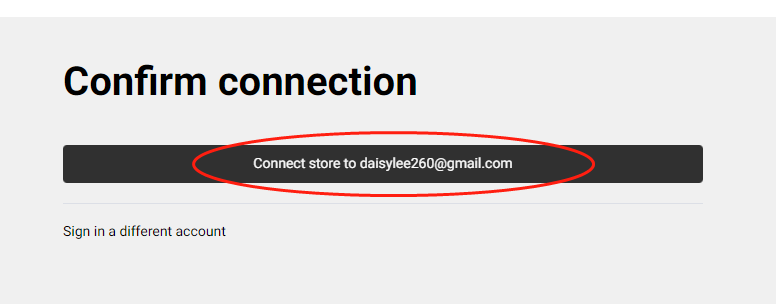
② Log in with your Etsy account and click the “Grant access” button to authorize.

00162e8d4eeed770bb8971647d8d17d

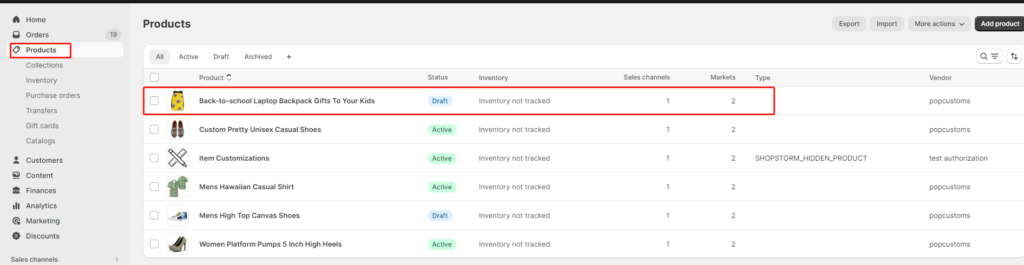
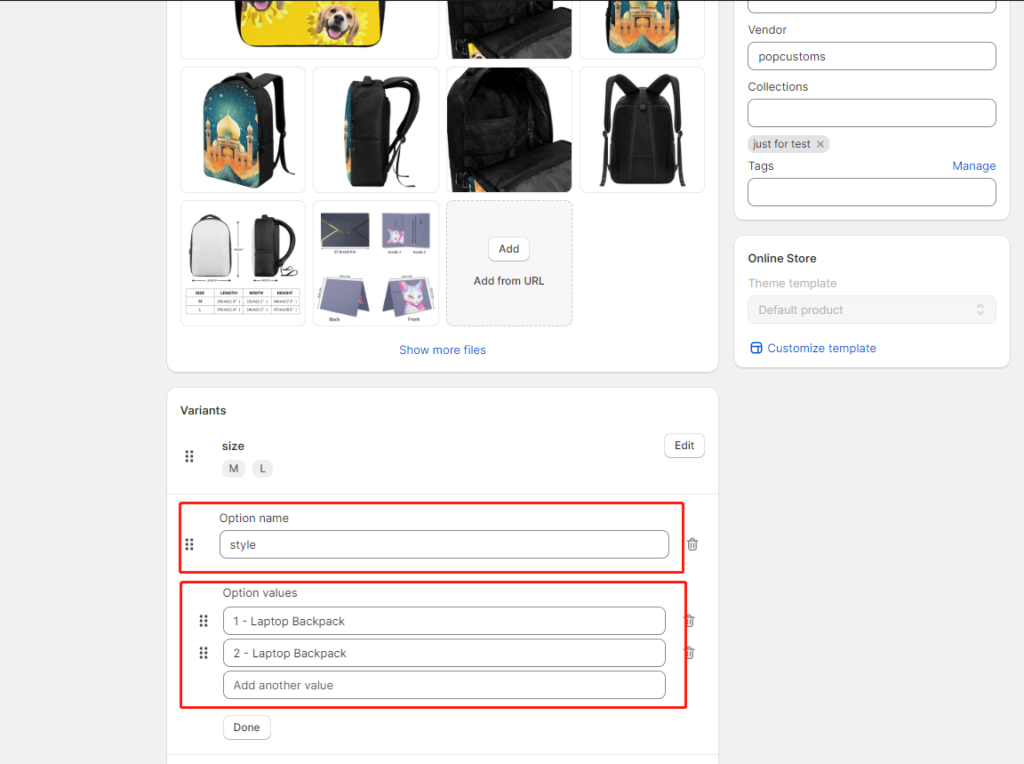
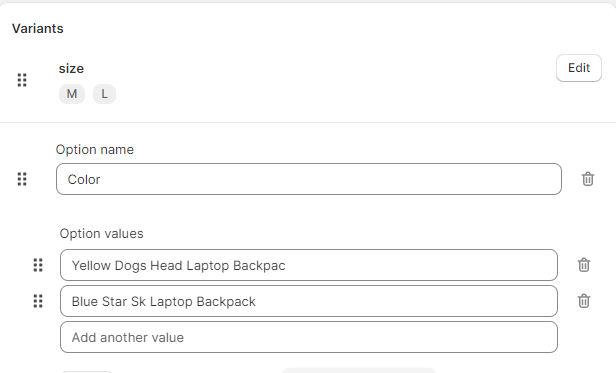
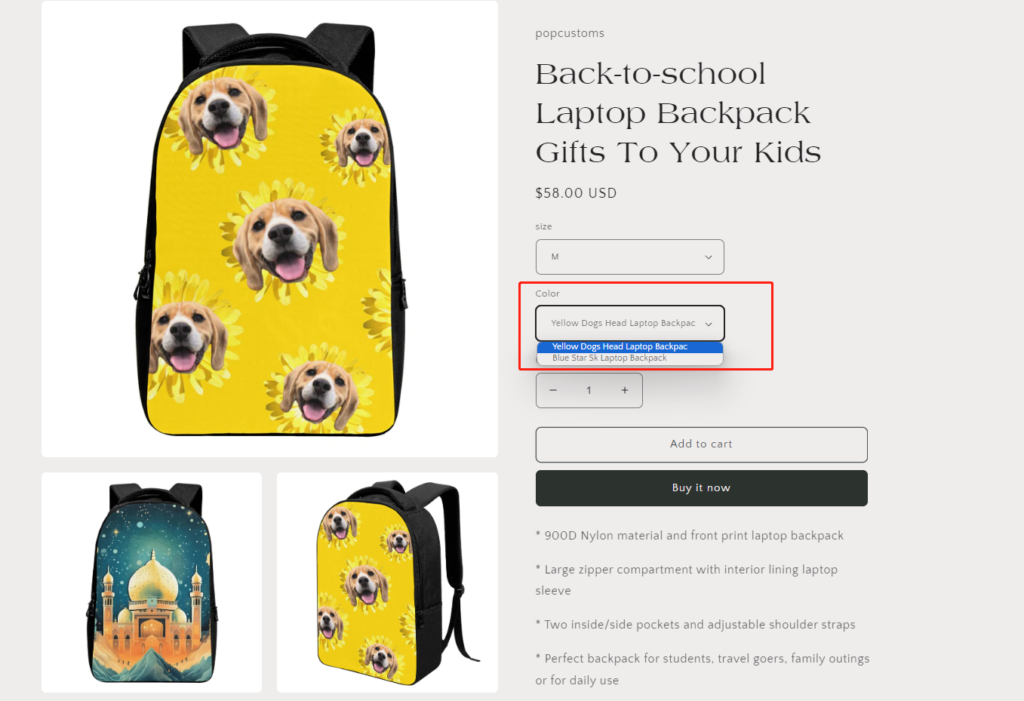
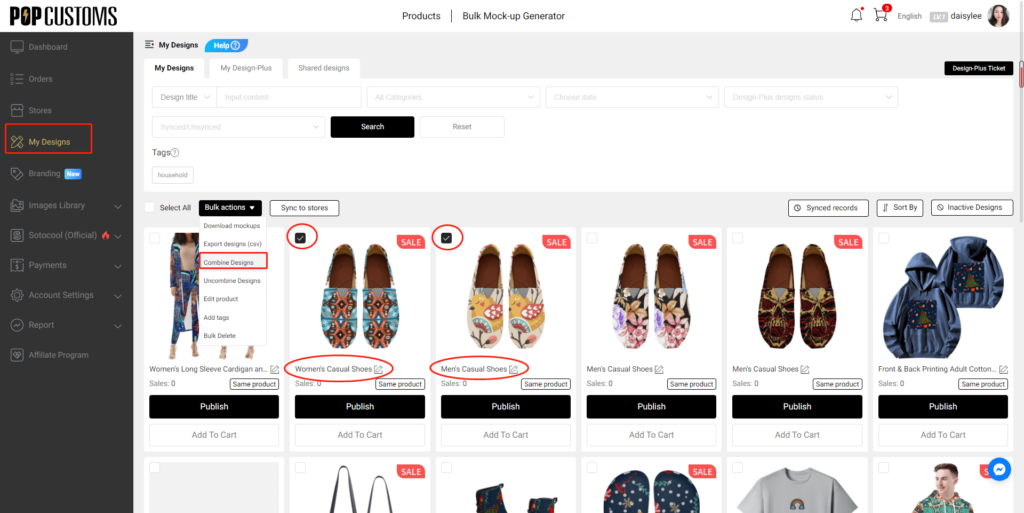
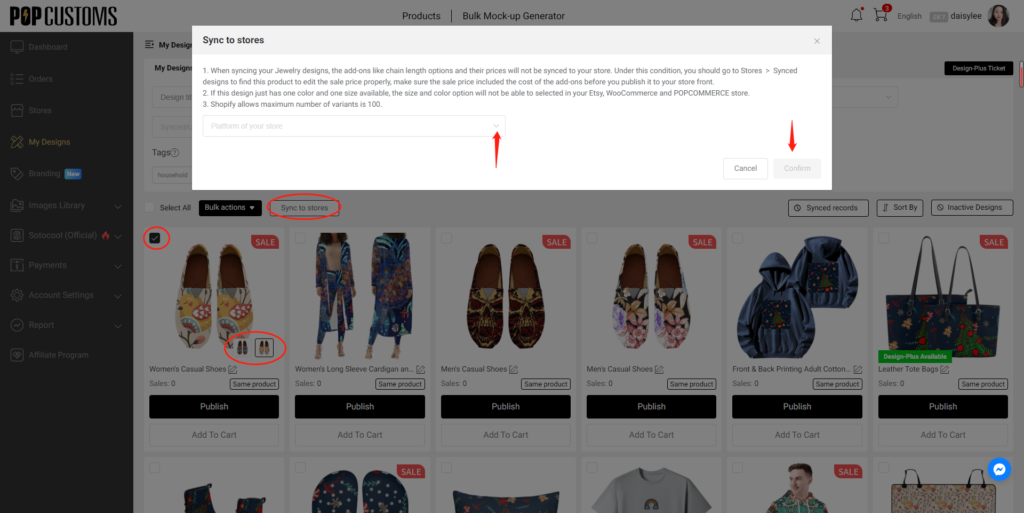
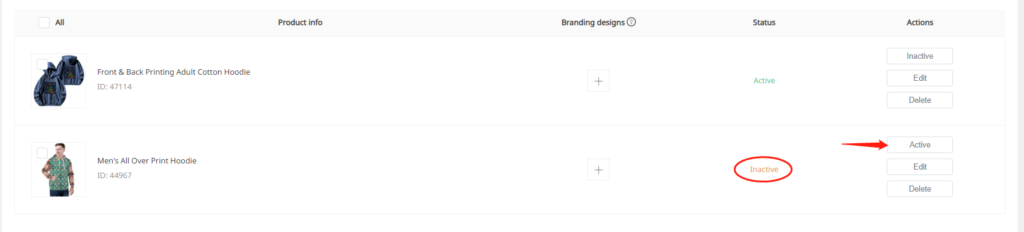
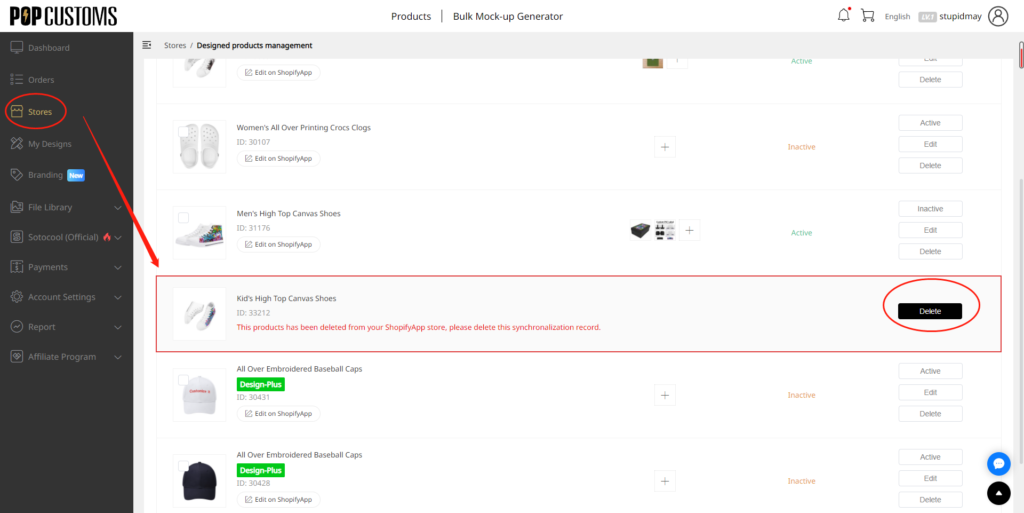
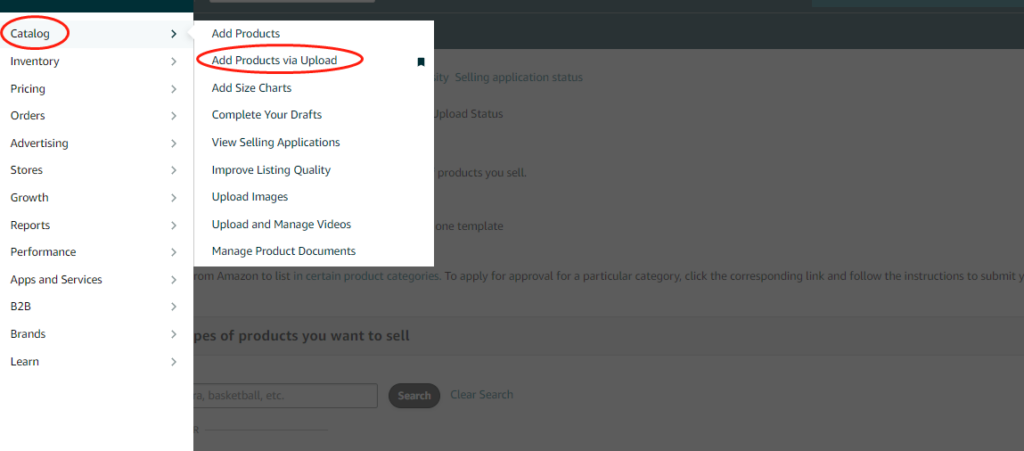
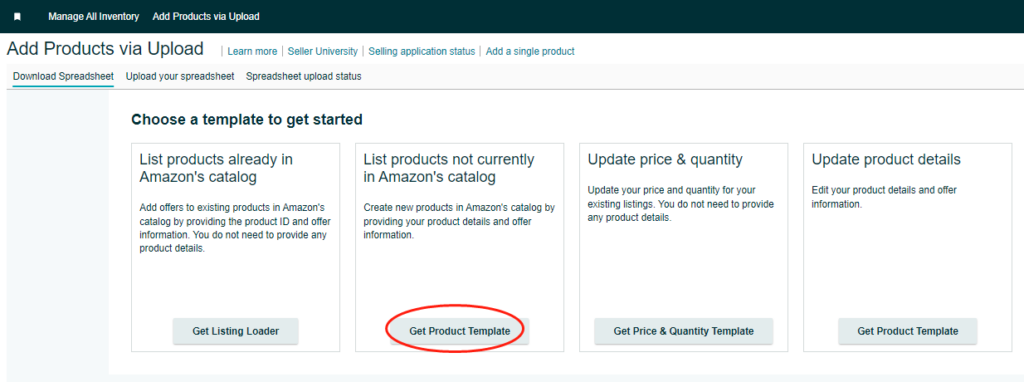
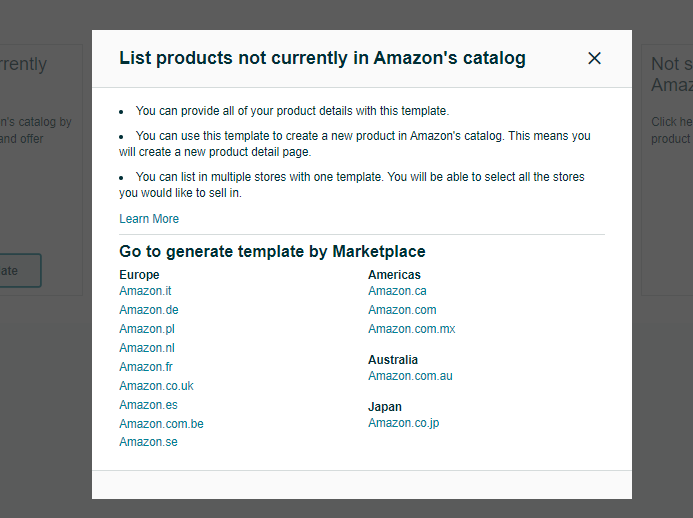
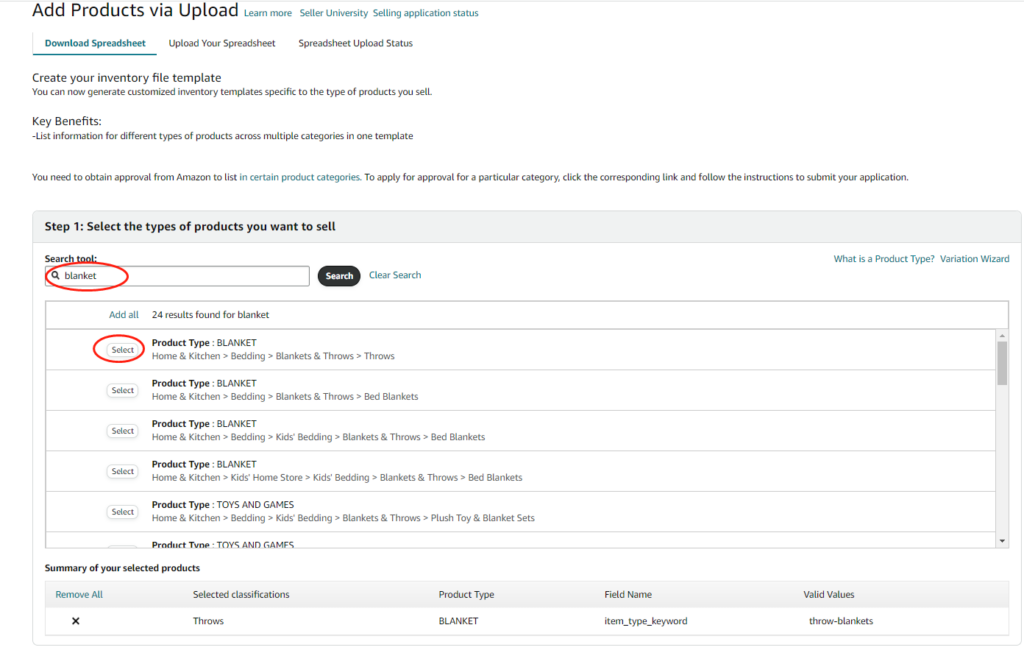
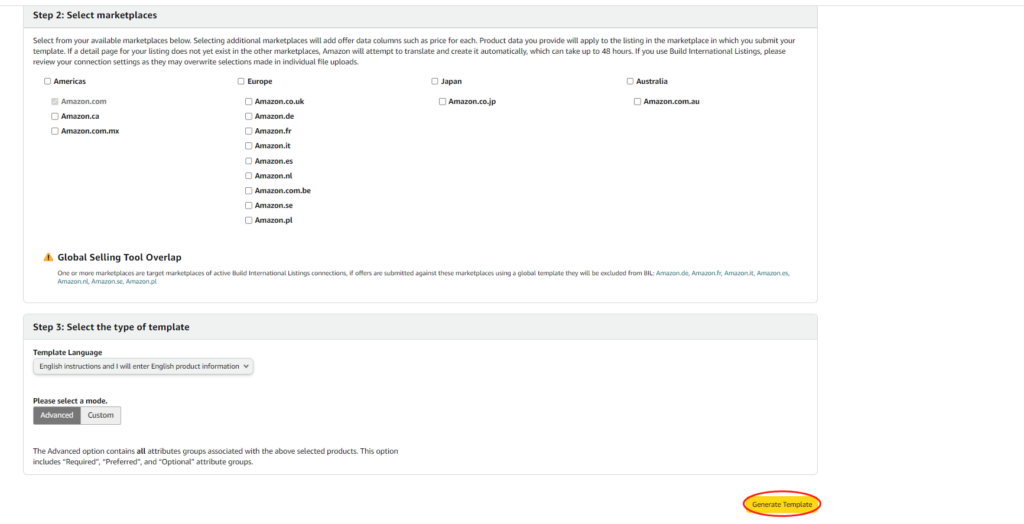
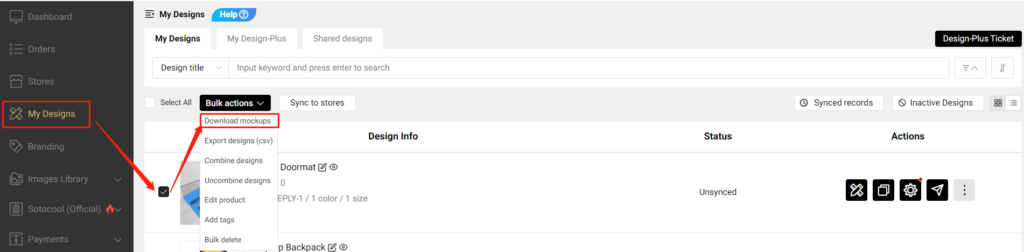
Step3:Add products and publish them to your Etsy store

To accept orders and make money you need to publish products to your Etsy store. On POPCUTOMS, you can just click Products on the Dashboard page to design and add products conveniently.

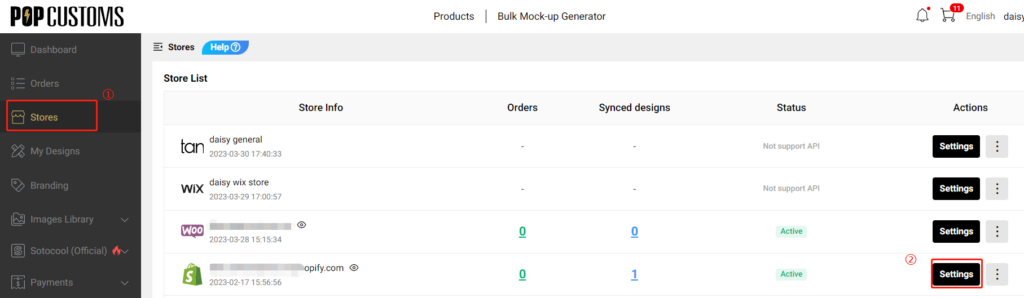
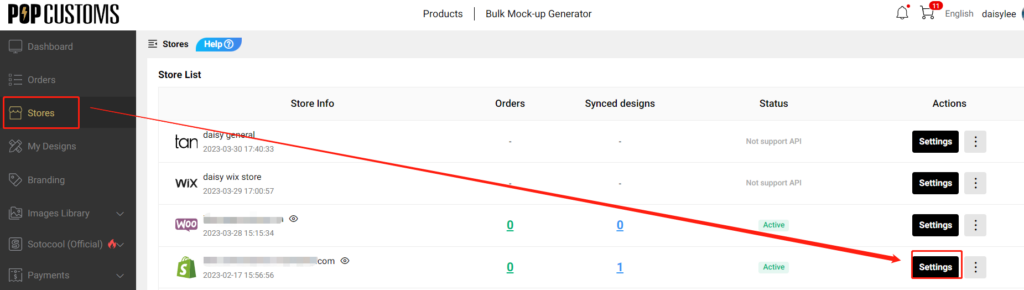
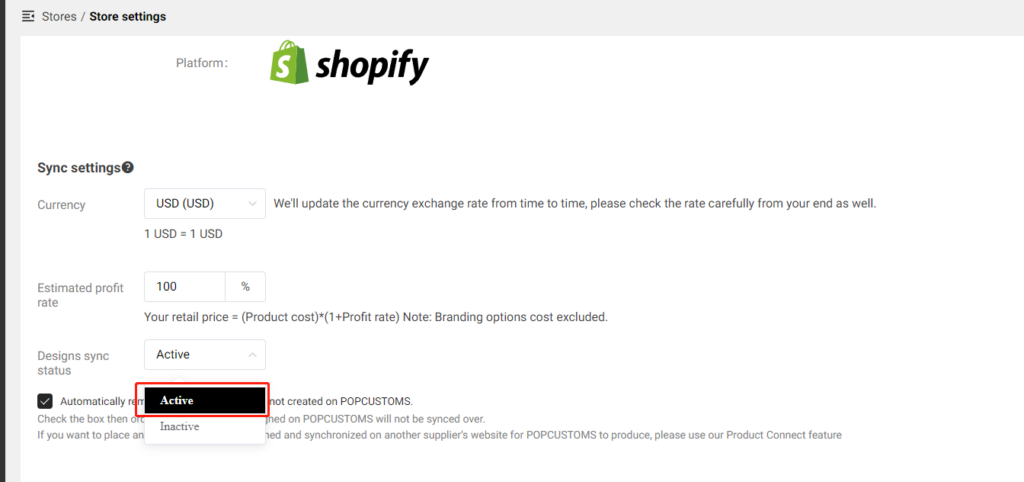
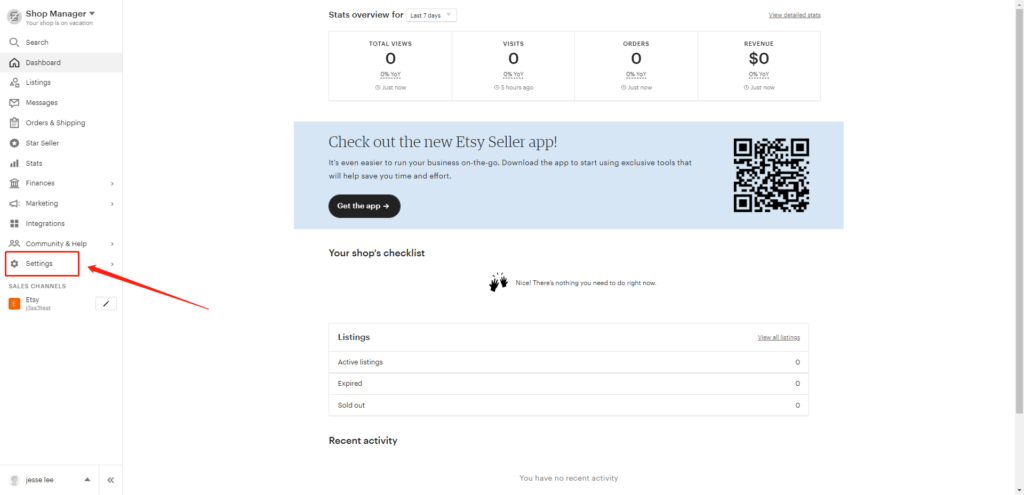
Step 4: Complete the Store settings after connection, including

一. Basic settings

二. Sync settings: ① Currency; ② Estimated profit rate; ③ Product status

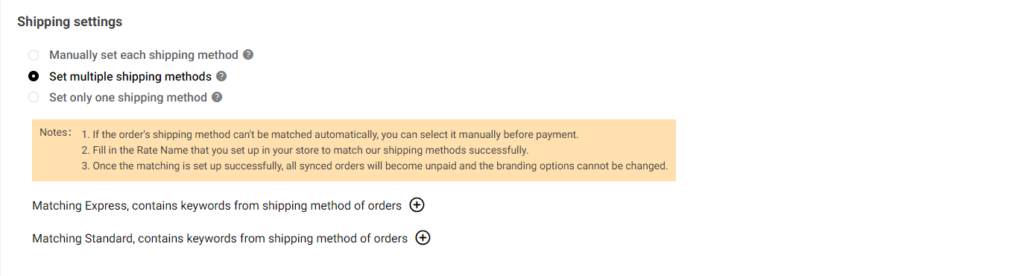
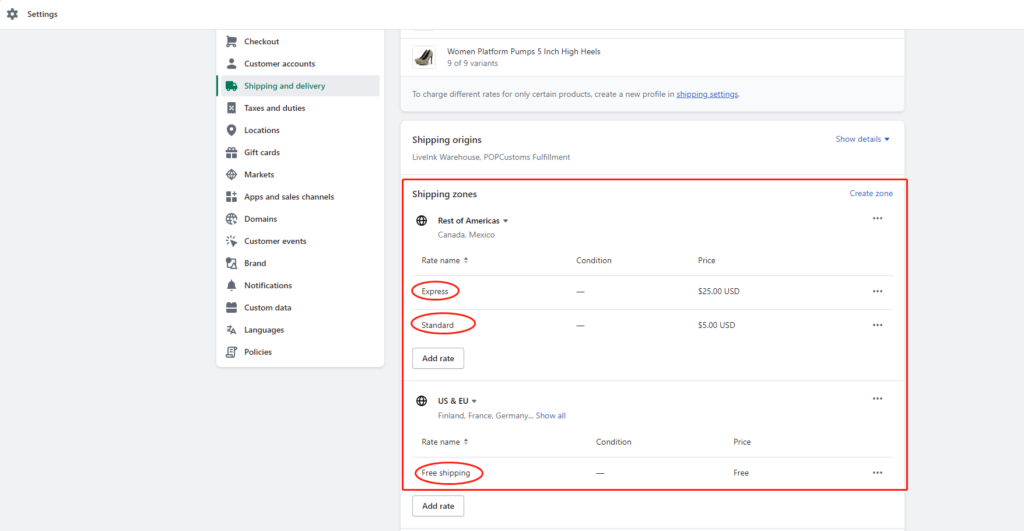
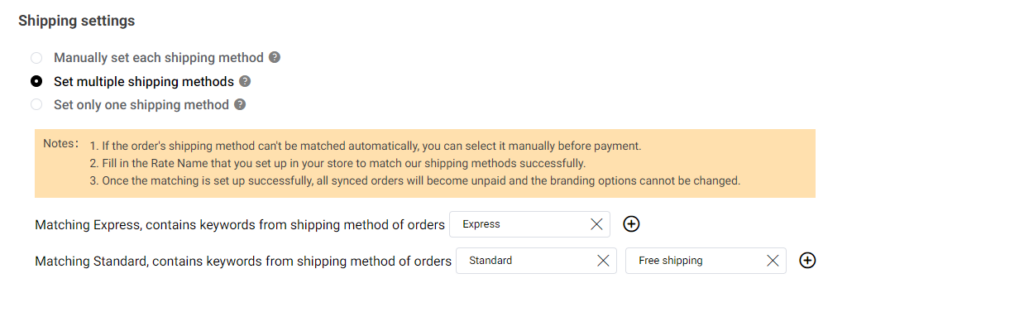
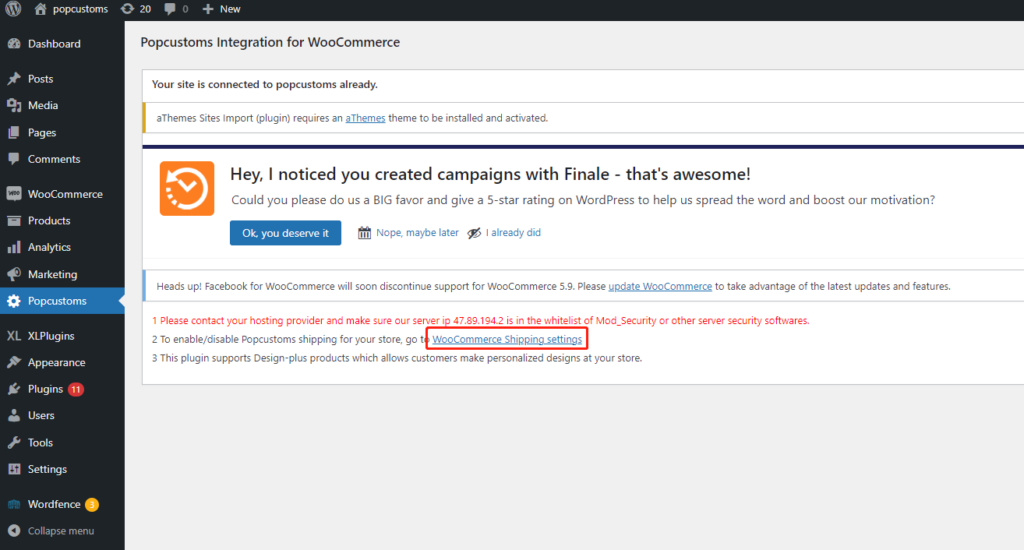
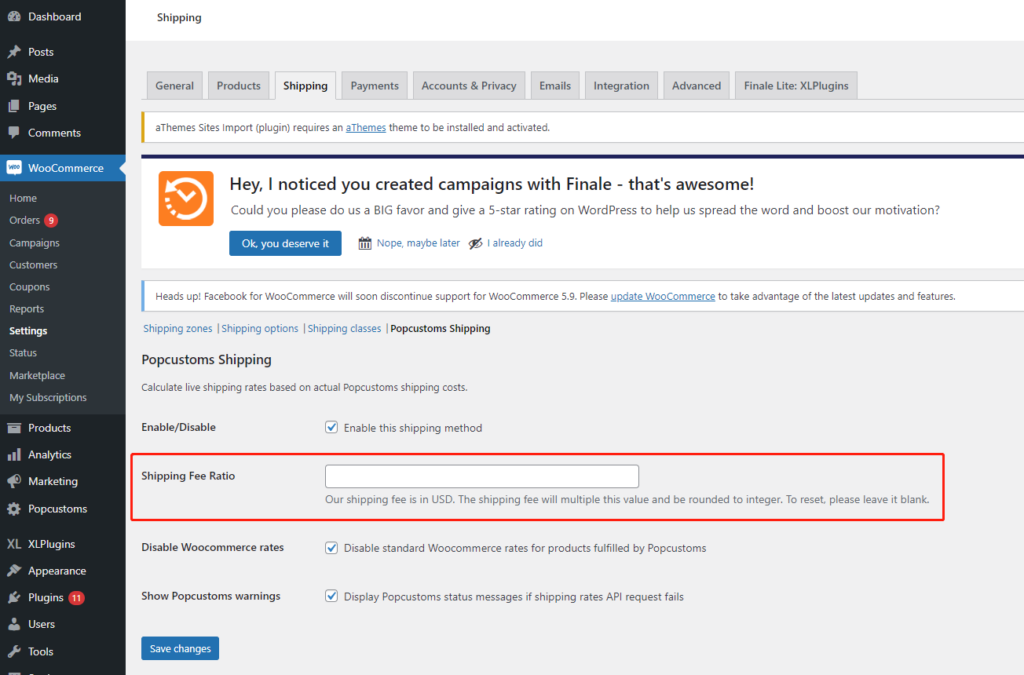
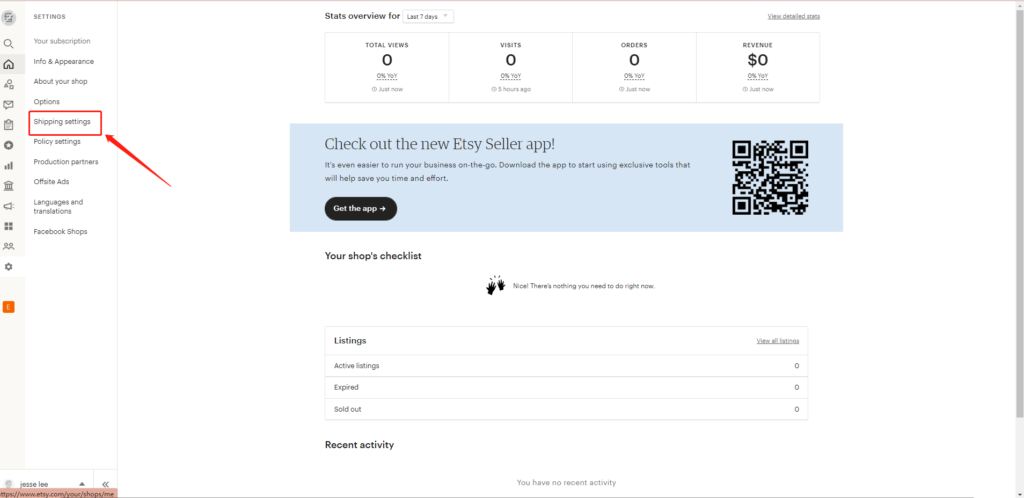
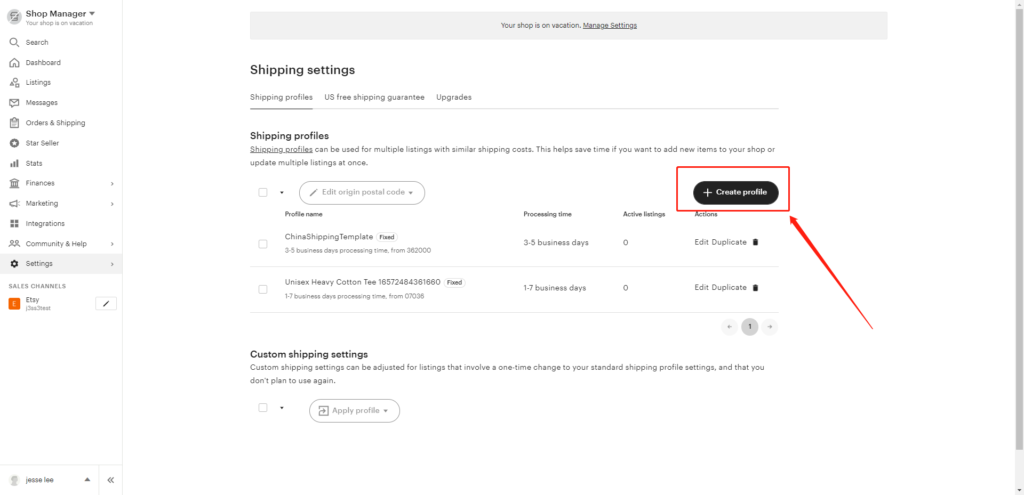
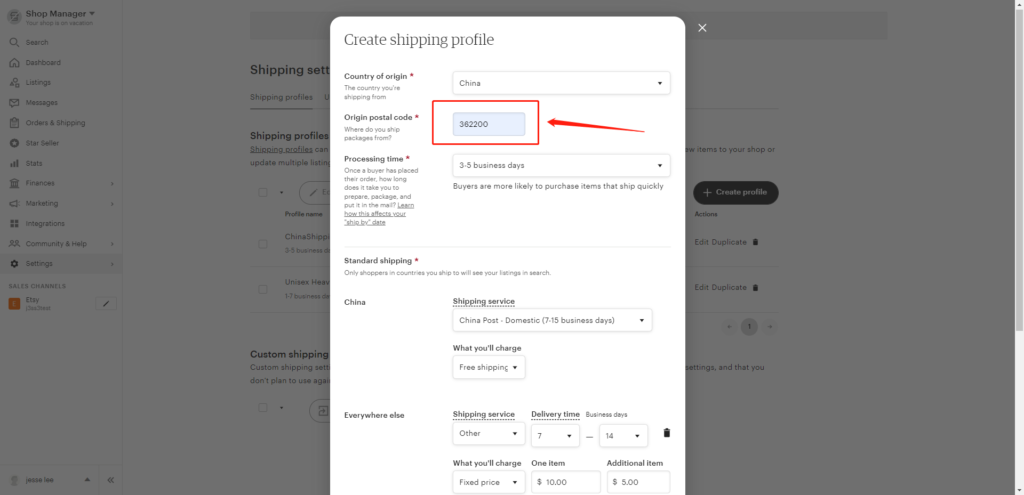
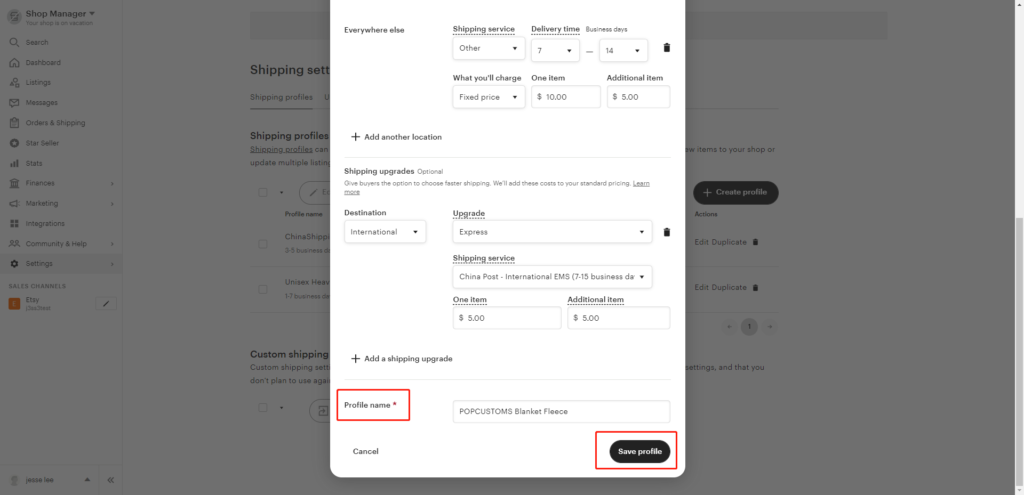
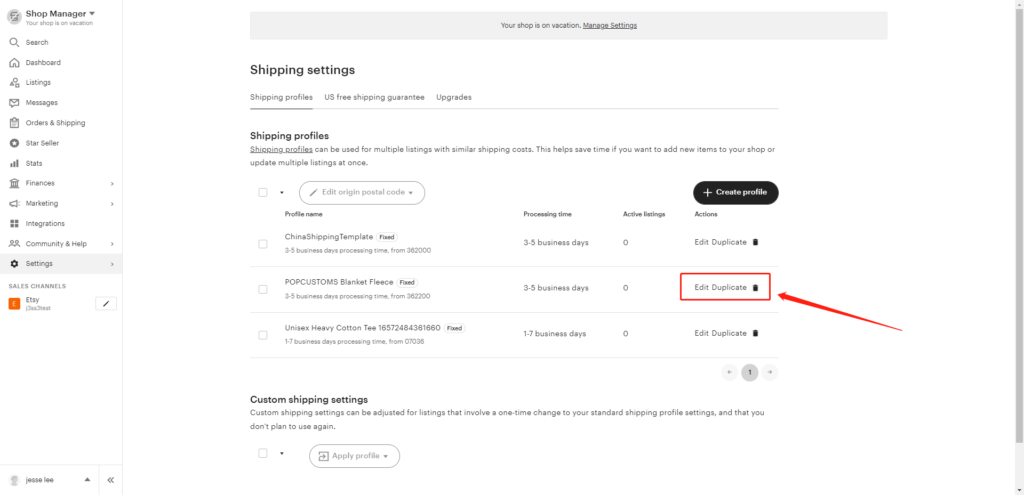
三. Shipping settings

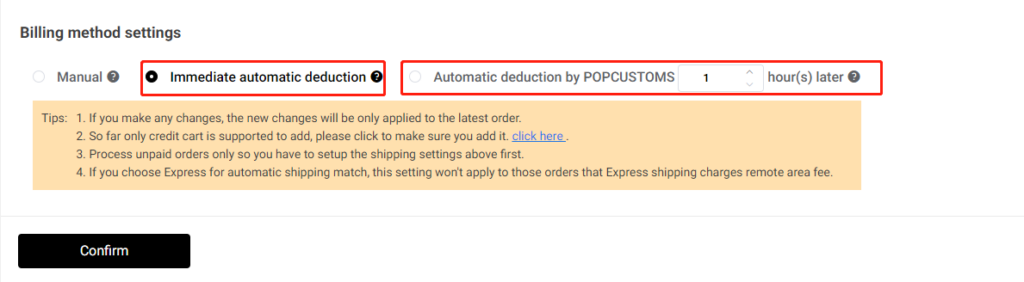
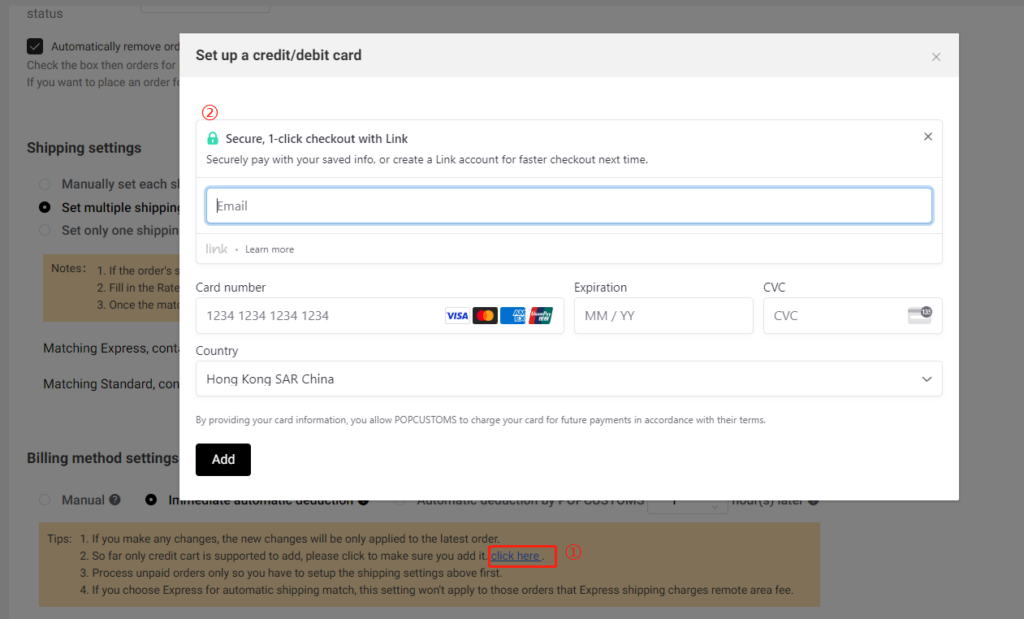
四. Billing method settings

Click the guide to check.

That’s all!

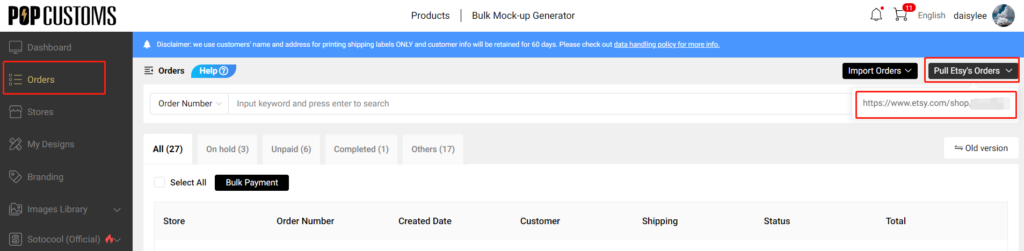
Note: Your Etsy orders will now be automatically imported into POPCUSTOMS.

Q: What if I want to change the color options of the products shown on my Shopify storefront?

Generally, when you publish our products to your Shopify store, the color values will be the base color of the product template rather than the color of your designs.

If you combine different designs of the same product and want to change the color options of the products shown on your storefront, please follow the steps below.

Here is the guidance on how to combine products.

Step 1: Publish combined products to store

Publish combined products to your store first but set it Inactive. Since Shopify allows sellers to create up to 100 variants for a product, we suggest you check the variants of products before you combine and publish them. For shoes, we suggest you combine at most 4 of them.

Learn more about the variants’ limitations on Shopify here.

Step 2: Modification color value on Shopify

Log in to your Shopify admin, click Products to find the combined product, and click it to modify the Option name and Option values of the product.

For example, I change those two values mentioned above as below,

And then save the changes, set the product’s status to Active. That’s what it looks like on your storefront.

Try this out!

Q: Can I sync products with Men and Women’s sizes to one listing in my store?

Yes, you can. Using our products combination feature, you can sync different sizes of the same product under one product listing to your store.

First, go to your Dashboard -> My Designs to find the product that you want to combine and sync to your store.

Second, sync the combined designs to your store.

That’s all!

Q: How to make my orders charged from my credit card automatically when they come to POPCUSTOMS?

In order for your order to be automatically charged to the credit card you have added to our POPCUSTOMS and go directly into production after syncing in, you should set up the shipping matching correctly and add your credit card to our site. Please follow the steps below to set them up.

1. Shipping settings

Go to Dashboard -> Stores to find the store you connected to and click Settings to get started.

Choose ‘Set multiple shipping methods‘ to set up the matching between the rate name you set in your store and the shipping methods provided by us so that your orders are assigned a proper shipping method automatically when they come to our site.

For example, I provide Express, Standard, and Free shipping for my customers to choose from in my Shopify store.

I have to set up the shipping matching to make sure my Standard and Free shipping orders will be assigned to the most cost-effective Standard shipping methods of POPCUSTOMS, and so do my Express orders. Hence the settings should be as below,

2. Billing method settings

Let’s move forward to complete the billing method settings to add your credit card. You can choose ‘Immediate automatic deduction‘ or ‘Automatic deduction by POPCUSTOMS x hours later‘ to make the automatic deduction happens.

And then click ‘click here‘ to add your credit card information.

After completing these settings, don’t forget to click the Confirm button.

That’s all!

Q: Why can’t I sync products to my Shopify store?

If you sync products to your store but they don’t show in your storefront, please click Stores -> Designed products -> Failed to find the reason.

We collect some reasons and solutions for your reference,

1- Exceeded the maximum number of variants allowed

If you have 50,000 or more variants/SKUs in your store, you’re subject to Shopify daily rate limit: 1,000 variants/SKUs per day. If you’re on the Shopify Plus plan, then the limit doesn’t apply to you. For a product, you can create up to 100 variants/SKUs. If you exceed the maximum number of variants allowed in Shopify, the product cannot be synced to your store. Under this condition, you must separate the product into two or more products to sync to your Shopify store.

Stores with 50000 or more variants are subject to a daily rate limit for uploading variants by using an app or CSV file import. You can add up to 1000 new variants in a day before the limit is reached. If you exceed this limit, then an error is displayed and you need to wait 24 hours to add products to your store again. Plus stores are exempt from this limit.

Click here to learn more about the rules of the variant on Shopify.

2- Collections show “No Data”

When you try to sync products to your store but there is no collection data for you to choose from. To solve this problem, you should go to your Shopify store admin to change the Collection type from Automated to Manual.

3- The status of your synced products is Inactive

Go to your Dashboard>Stores, find your Shopify store, and then click the content under Synced designs to find it,

If the status of your synced designs is Inactive, change it to Active then it will show in your storefront successfully.

To avoid this issue happens again, we suggest you allow all synced designs from our site to your store to publish automatically in your store. Go to Stores-> Settings to complete this setup as follows.

4- Delete products from my Shopify and can’t sync them again

When you delete a product from your Shopify admin page, you have to delete the previous sync record from POPCUSTOMS as well.

Then you can go to My Designs to find this product to resync it again to your Shopify store.

Q: How long does it take for a new Etsy order to come to POPCUSTOMS?

For technical reasons, Etsy won’t notify popcustoms.com of new orders therefore we’ll have to pull the orders on a regular interval.


We choose 1 hour as the interval and we might reduce the interval in the future.
If you want to pull orders immediately, please go to Dashboard -> Orders to pull the order manually right away.

Q: How to set up the shipping for POPCUSTOMS products in my WooCommerce store?

Please note that you can use our live shipping rate for POPCUSTOMS products in your WooCommerce store. Let’s guide you to set up the shipping in the following instruction.

First of all, find the POPCUSTOMS in your WooCommerce Dashboard and click the button I’m a popcustoms.com user.

Then click WooCommerce Shipping Settings on this new page.

Make sure that all these three boxes are checked. And you can fill in a Shipping Fee Ratio to exchange the shipping fees from USD to other currencies you used in your store.

*For example, you use EUR currency, and the currency rate between USD and EUR is

1USD=0.93EUR

Then, you should fill in 0.93 in the Shipping Fee Ratio to make sure the shipping fee is correct in your store.

Finally, click the Save changes button to save it.

Something important to know:

We charge VAT for 27 EU countries, LU/MT/CY/DE/RO/AT/BG/EE/FR/SK/BE/CZ/LV/LT/NL/ES/IT/SI/IE/PL/PT/FI/GR/HR/DK/SE/HU. The

T/CY/DE/RO/AT/BG/EE/FR/SK/BE/CZ/LV/LT/NL/ES/IT/SI/IE/PL/PT/FI/GR/HR/DK/SE/HU. The

HU. The VAT is charged on the basis of the product’s retail price, and it is not listed individually but is included in the shipping fees in WooCommerce. In other words, the higher the retail price you set, the higher the shipping fees (VAT included) the customer should pay.

Q: Can I integrate my Amazon store into POPCUSTOMS?

Currently, we can’t integrate into Amazon stores, but you can export your design info including images and descriptions from our website, fill them in your Amazon product template, and import them to Amazon.

Step 1: Create a custom store

Step 2: Download Product Template from Amazon

Step 3: Export designs from POPCUSTOMS

Step 4: Fill in Amazon Product Template & Upload

To sync products and place orders manually, create a custom store.

Step 1: Create a custom store

Click the Create button under Amazon to create an Amazon store, and name the store as needed. This store will be used when you import your Amazon orders.

0016300a9e1cb0b5481133108b66411

0016300a9dbc6160c167e77625f8a82

Step 2: Download Product Template from Amazon

Go to your Amazon seller central to generate and download the product template you need.

Choose the marketplace of your Amazon store.

This product template file should be saved for use later.

Step 3: Export designs from POPCUSTOMS

After completing your designs, you can go to Dashboard -> My Designs to find and select them, and click Bulk actions -> Download mockups to download product data.

Step 4: Fill in Amazon Product Template & Upload

Copy descriptions, images, and SKUs from the downloaded product data file at POPCUSTOMS and paste them to the product template downloaded from Amazon.

*Since we use SKUs to match products when producing, we suggest you use our SKUs and don’t make any changes.

Finally, upload the product template to Amazon

That’s all!

*Click here to learn how to import your Amazon orders to us for fulfillment.

Q: How to create a shipping profile for POPCUSTOMS products on Etsy?

You can set up calculated shipping on Etsy only when you ship from the US or Canada. However, POPCUSTOMS ships items from China. Under this condition, the calculated shipping settings do not work for our products.

If you choose POPCUSTOMS as one of your suppliers, we suggest you create an exclusive shipping profile for our products. Here is the guide below,

Step 1: Create shipping profile

Step 2: Fill in shipping details

Step 3: Name the profile and save

Step 1: Create shipping profile

Log in to your Etsy account, go to the Shop Manager -> Settings -> Shipping settings -> Create profile.

Step 2: Fill in shipping details

Fill in the requested shipping information, for example,

1- Country of origin: China

2- Original postal code: 362200

3- Processing time: You can find the production time for each product on popcustoms.com

4- Standard shipping: You can provide different Standard shipping options to different destination countries. You can set “Free Shipping” or “$xx for the first item” and “$xx for the additional items”. You can download our shipping fees for reference here https://popcustoms.com/shipping

5- Everywhere else: If you do not find the corresponding shipping services in the options, you can choose Other and enter the delivery time and shipping fees manually.

6- Add a shipping upgrade: You can also add options for shipping upgrades so that the buyers can choose a faster shipping method.

Step 3: Name the profile and save

Name this profile properly so you can distinguish it from your other shipping files created for your other suppliers. Save it to use, that’s all.

You can find all the shipping profiles you created here, you can edit or duplicate them if needed.

WooCommerce Store Integration Tutorial

Note:

1. Please follow all the steps below to authorize.

2. A platform can only authorize one store. If you want to authorize a new store on the same platform, you need to delete the previously authorized one.

Step 1: Install POPCUSTOMS WordPress plugin

Log in to your WooCommerce account, click Plugins -> Add New, and search POPCUSTOMS to install the plugin.

001630d8546ad502e7832d3822187af

001630d8547c58e5b90bd0dd7bed5ce

After installing, click Activate. Then you can find a POPCUSTOMS plugin added in the left column, click it and go to register at POPCUSTOMS.COM.

001630d857a59a8c2bab6aa8a4ed02f

001630d8592a43b9ec0cb43bbb744f2

Then you will be driven to POPCUSTOMS to sign up for a free account or to the Dashboard directly if you have signed up and logged in.

Step 6: Connect your WooCommerce to POPCUSTOMS

① Click Stores -> WooCommerce -> Connect to fill in your WooCommerce store domain and authorize the connection.

image.png

00162e8d1c3be3dc143d4d765c274bd

00162e8d231b28f88685471e3d1089f

② Click the “Approve” button to complete the authorization.

00162e8d28041602cfa58098c571c63

Next step, we suggest you complete the store settings.

That’s all!

Note: Your WooCommerce orders will now be automatically imported into POPCUSTOMS.